


As new players play more magic, they discover a number of archetypes, or deck themes, that they encounter time and time again. In this article we will tackle how to take down one archetype many find themselves frustrated to play against: control.
Playing against control requires you to make plays that seem counterintuitive against many other archetypes, and as such, many players struggle with this matchup. In order to understand the lines of play to make, you must first understand how control decks work.


“The Four Quadrants of Control.” is how I refer to what I believe are the four main jigsaw pieces that form a control deck: Single-target removal, Counterspells, Card Advantage and Sweepers. The combination of these four quadrants enables a control deck to continuously answer threats while maintaining a resource advantage.
My end goal is to leverage our understanding of these quadrants, and teach you how to exploit their weaknesses.
Quadrant 1: Single-Target Removal

Deckbuilding plays a crucial role in making an opponent’s single-target removal inefficient. For me, the biggest deckbuilding factor to exploit this is maximizing the number of “standalone threats” in a deck. A standalone threat is a card that has a high raw power level all on its own. Think Questing Beast and Legion Warboss. These cards are good whether or not you already have a board presence, because they are must answer threats. By having a number of such threats, we’re able to make, and take advantage of weak points in our opponents remove-spell armour.


Similar to standalone threats are cards that provide immediate value. Let’s look at Explore, Energy, and Food. All three of these mechanics have spawned incredibly powerful midrange decks based on the value created upon an individual creature entering the battlefield. Rogue Refiner is a prime example of what you are looking for. Everybody’s favorite rogue not only left behind energy for your other cards to use, but also replaced itself by drawing a card. Even if Refiner is instantly killed, you still acquired value by playing it, allowing you to repeat the process in future turns, all while building an advantage. Jadelight Ranger and Gilded Goose are other examples of extremely successful cards based on being packed full of enter the battlefield value.

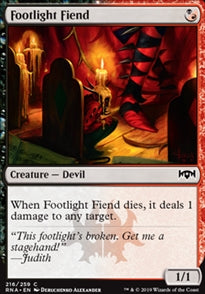
Death triggers are another way to gain an edge versus single-target removal. In a way “when this creature dies” triggers are similar to enter-the-battlefield triggers, but an opponent has to actually kill the creature. We can choose creatures that not only provide us with benefits when they die, but are threatening on their own. We don’t want to give our opponent the choice of having to kill a creature, we want to pressure them into a tough situation where they HAVE to kill a creature, even though we will receive a benefit. It is important to keep in mind however, that exile-based removal spells are becoming more and more common. Vraska's Contempt and Lava Coil both represent this wholeheartedly. Formats and metagames can help inform you if death triggers are the way to go, while it’s hard to go wrong with enter the battlefield effects.


At the other end of the spectrum we have cards like Metallic Mimic and Steel Overseer. Metallic Mimic can be exceptionally powerful when it can buff following creatures, and Steel Overseer can diversify your damage across a board of artifact creatures. Note: in both situations you need time to leverage the power of these cards. Your control opponent can simply answer the subsequent creatures following a Mimic, rendering it no longer threatening. The same goes for Steel Overseer, which doesn’t even give you the option to use its effect right away. In the end, although these cards can be powerful, drawing cards like them against control can drag you down. These cards give your opponent not only time, but the option to save their removal for following threats. Although cards like Mimic and Overseer are not “standalone threats” remember that not every match is against control, and chosen wisely, these cards can still make the cut. Ultimately it comes down to your judgement on how important a given card is to your gameplan.


Another way to improve your threat package is to make your individual pieces harder to answer. One way of doing this is by having recursive threats. Each time you return a creature from the graveyard your opponent has to answer it again. By forcing your opponent to answer the same threat multiple times, you can run them out of answers. This also helps you swing the card advantage pendulum back in your favor; if the control player uses numerous removal spells on a single card you’re able to use multiple times at only the cost of a few mana, who is up on cards? Recent examples of great recursive threats are Dread Wanderer and Gutterbones. Wanderer was an all star in the Mono Black Zombies deck of Amonkhet Standard, and Gutterbones continues to be utilized in decks like RB Sacrifice and Rakdos Knights. Inclusion of aggressive one-drops that reward you for getting on board and applying pressure, but will continue to be a pain even as the game goes long, is just one example of making your individual pieces harder to answer.


Creatures are often the focal point from a broad view of most magic games, but let’s not forget non-creature spells. The majority of single-target removal can hit creatures. Simply changing up some of your overall package to non-creatures can make a lot of a control player’s removal completely irrelevant. Think about playing a couple planeswalkers, an artifact or two, or maybe some enchantments. Diversifying in this way will make it more difficult to answer everything from the control players end, giving you the upperhand.
Keeping control in mind is very important when it comes to deckbuilding. Single-target removal is exactly that, it only has a single target. By trying to present multiple threats, you make it much harder for your opponent to answer what you are aiming to do. You’ll notice that none of the examples I gave above cost more than four mana. One of control’s big strengths and avenues of gaining an edge is to answer threats for less mana than the owner of the spell paid. By doing this they free up mana to cast spells from the other quadrants. By deploying multiple cheap threats in a single turn not only does the control player lose their mana advantage, they will also run out of answers, and eventually your threats are going to stick around for longer than the time it takes to say “in response.”
Quadrant 2: Counterspells


The second quadrant I want to discuss is counterspells. Let’s get one thing out of the way: cards that cannot be countered are good against counterspells. However, cards with this line of text are often weaker or more situational for this privilege when compared to other cards with the same mana cost. Essentially, just because a card cannot be countered does not make it good against control (and most uncounterable cards are not as strong as Carnage Tyrant).
Beating counterspells is more about the way you choose to navigate a game than it is deckbuilding. One simple way to gain an edge is to deploy your threats after combat. Going to combat before you play anything makes decisions much harder for your opponent since they have far less information. It often allows an attacker to get a hit in before being killed. Playing in this way makes your opponent have to decide whether or not to use their removal before damage, while also having to worry about what you may play later in the turn. The times where the control player does use their mana to kill an attacking creature, it means they have less mana when they may want to cast a counterspell during your second main phase. For example, here is a thought process I often take into consideration when playing a Red aggro deck. Due to the presence of burn spells, the control player often feels the need to protect their life total and therefore is more likely to remove an attacker. This opens up the option for a powerful post-combat play such as Chandra, Torch of Defiance or Experimental Frenzy. By navigating my turn like this, I am more likely to resolve these big threats and pull ahead. I can accomplish this by simply playing things in a different order.
A different option you have available is to deploy creature threats first. As I mentioned earlier, nearly all single-target removal that sees widespread play is designed to deal with creatures. With this in mind we want to bait our opponent into countering a creature. This can be hard to do, but by building our deck with creatures that provide immediate value as stated earlier, it is much more likely the control player will decide to use their counterspell and prevent you from gaining resources all together. We can also attempt to recognize when our opponent hasn’t drawn removal and press them to use up their counters. Pressuring them in this way can help as the game goes longer. It makes any subsequently drawn single-target removal less relevant as its role is now overlapping with that of the previously cast counterspells. The goal is to run our opponent out of the more versatile prevention in counterspells and to strand them with single-target, probably creature, removal. This allows us to potentially slam a super impactful threat such as The Immortal Sun or Nissa, Who Shakes the World straight through their now creature-slanted defenses.


Lastly, we have my favorite trick in the book. My sideboard for the control match-up will often contain a low mana cost non-creature threat. In recent Standard formats, the bulk of versatile counterspells cost three mana. Regardless of whether you are on the play or the draw, you can use these cheap non-creature spells to go underneath most counterspells and cannot be dealt with via single-target removal. Anything from Dragon Fodder to Dawn of Hope will do, as long as you are striving to make their counterspell suite less efficient.
Quadrant 3: Card Advantage
Card draw effects and Planeswalkers are two popular forms of card advantage used by Control decks.


The first thing to note is that the instant speed card draw spells of recent Standard formats have cost four mana. Think: Glimmer of Genius, Hieroglyphic Illumination, and Chemister's Insight. Opponent’s card draw is inherently hard to combat directly. You can however make the spell as awkward to cast as possible. The simplest way to do this is to make as powerful a play as possible on the turn in which the control player first has four mana available to them. By doing this you force them to answer your threat with a card from the previous quadrants, rather than cast their card draw spell. Such a line puts enormous strain on the control deck, which will wither without plentiful resources. By making this sort of play, the cards in each quadrant clash with each other for mana rather than being deployed harmoniously. The Rakdos Vehicles deck of days gone by exemplifies this principle; often curving Rekindling Phoenix into Glorybringer. The combination of these cards’ power levels demanded immediate answering, stifling a control deck’s ability to gather resources, and pushing Vehicles over the top.


The second form of card advantage I want to discuss is planeswalkers. The most important factor here is the sorcery speed nature of these cards. Whilst incredibly powerful, a planeswalker will require the Control player to somewhat lower their shields for a turn cycle. Additionally, in contrast to the normally instant-speed plays Control makes, you will have a full turns worth of information laid out for you. These downsides are what make the planeswalker turns such an exciting prospect for someone attempting to take down Control.

In most cases you will want to get rid of the planeswalker as quickly as possible. The primary way to do this is by planning to have multiple threats on board by the turn you are expecting a planeswalker. Let’s use Teferi, Time Raveler as an example. He can either tick up to 5 Loyalty, allowing an instant speed Time Wipe, or go down to 1 Loyalty and remove one of our threats. In both of these scenarios, Teferi is under immense pressure because we diversified our threats.
It’s also important to know when to ignore a planeswalker. There are situations where it is going to take you just as much effort to remove a planeswalker as it is for you to simply kill your opponent. Identifying these situations as soon as they arise is crucial, as one misdirected attack could lose you the game. Most commonly, the situation can be identified by a simple calculation of how many turns it will take you to remove the planeswalker vs. kill your opponent with that planeswalker on board. Normally, the correct course is to do whatever takes less time. There are of course exceptions to this rule, especially considering the recent upshift in the power level of walkers. Fear of a planeswalker’s “ultimate,” or powerful high-cost minus ability, is one of the factors that will drive us to attack it, rather than the opponent.


Finally, if you are playing Black, discard effects are one way you can combat card advantage head to head. Removing powerful spells and planeswalkers from your opponent’s hand forces them to play a one for one game, further straining their ability to grow their resources. Control is not favored in a one for one fight, instead, it leverages its card draw and a greater density of lands to slowly gain an insurmountable advantage over the opponent.
Quadrant 4: Sweepers
The final quadrant is sweepers. Sweepers, or board wipes, are cards control decks utilize to gain virtual card advantage in the form of dealing with multiple threats with a single card. Board wipes come in different forms, therefore I will briefly go over each.


Learning to play around Wrath of God effects can be daunting. In a situation where you are worried about a “wrath,” you want to present a board that is clocking the opponent, but does not leave all your hopes and dreams stranded in the event the sweeper is deployed. It’s hard to have an absolute rule, but generally I aim for a three turn clock at all times. If you deploy creatures any faster than this, you are asking to be blown out, as most of your resources will be on the table and vulnerable. If you apply less pressure than begs for the casting of a sweeper, you will struggle to ever get ahead of the answers your opponent is presenting. Once again, playing around a wrath is dependent on the situation. For example, if your opponent is at 20 the “three turn clock rule” is simply unreasonable. The same exception applies when the control deck is almost dead and you want to finish the job. Although “wrath” effects are the most common form in which we see sweepers appear. This is not the only way control players can clean up multiple creatures.
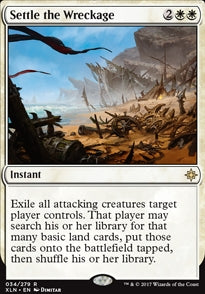

Settle the Wreckage is a prime example from a group of cards that only get rid of attacking creatures. Playing around these can be really simple, because they can only be used to get rid of creatures you choose to put into combat. In this case, knowing what cards are legal in a format and what sweepers control decks generally choose is crucial. Whether to take a line of attacking with just your best creature or with multiple bad creatures varies from deck to deck, is based on what your ideal board state after such a sweeper is, and takes time to build a general rule for.

Languish effects are another corner-case. Since the removal here is conditional, prioritizing your bigger threats, ones that will survive, is key. That said, if you are playing a deck that is particularly vulnerable to Languish type effects, it is safe to treat this case as you would with a Wrath of God effect. Just make sure you keep in mind that indestructibility and regeneration strive against wraths, but fail against Languish.
With all of the quadrants covered, there is one last trick to playing against control I’d like to go over.
A “topdecking” situation happens when you’ve burnt through all your gas and are at the mercy of the top of your deck. Inexperienced players often concede or simply deploy their cards as they draw them. Alternatively, you can wait until you can deploy multiple threats in a single turn. By deploying multiple threats at once, you decrease the likelihood of your opponent being able to deal with them all. Even if things may seem hopeless, it is important to evaluate, think through, and take the line that can lead you to potential victory.
I hope my guide to the four quadrants of control has been useful! If you enjoyed this article or have any questions, you can find me on twitter @MtgDavis. I also stream evenings (UTC) right here. Until next time: be sure to show those control players who’s boss!


