


Creativity decks in Modern often win the game in the same way: by casting Indomitable Creativity on some tokens to cheat in Archons of Cruelty.

But the road to this destination varies greatly among Creativity players, and this is evident in deckbuilding. There are Jund, Temur, 4C, and 5C variants which have all seen success, and within each of these archetypes, there is significant diversity in card choices. Some lists play three Prismari Command, others play zero. Some play three Teferi, Time Raveler, others play zero. Some play four Persist, others play zero.
Jund is the most proactive and combo-oriented of the variants, with hand disruption to clear the way for its multiple Persists and Creativities. Temur is more of a tempo deck, and 5C is the most controlling. While this is broadly true, each archetype can be tuned to nudge it in a certain direction, to align it with how the player plays the deck. This is why I think Creativity is such an exciting archetype; it's incredibly flexible, and two players with different proclivities in their play patterns can build and play the deck in dramatically different ways to equally successful results.
This article is going to focus on 5C Creativity and the way that I approach building and playing the deck. 5C is the version I've had by far the most success with, and it took me some time before I figured out not just a list I liked, but also found the play patterns that I was happiest with. If you're interested in additional Creativity resources (and you'll see that I stole ideas from all of them), you can read this article by Kyle Boggemes, this one by Andrea Mengucci, and this article by Yriel.
Mainboard – Non-Flex
4 Leyline Binding
4 Fable of the Mirror-Breaker
As the metagame currently stands, I wouldn't go below these numbers on any of the cards above.
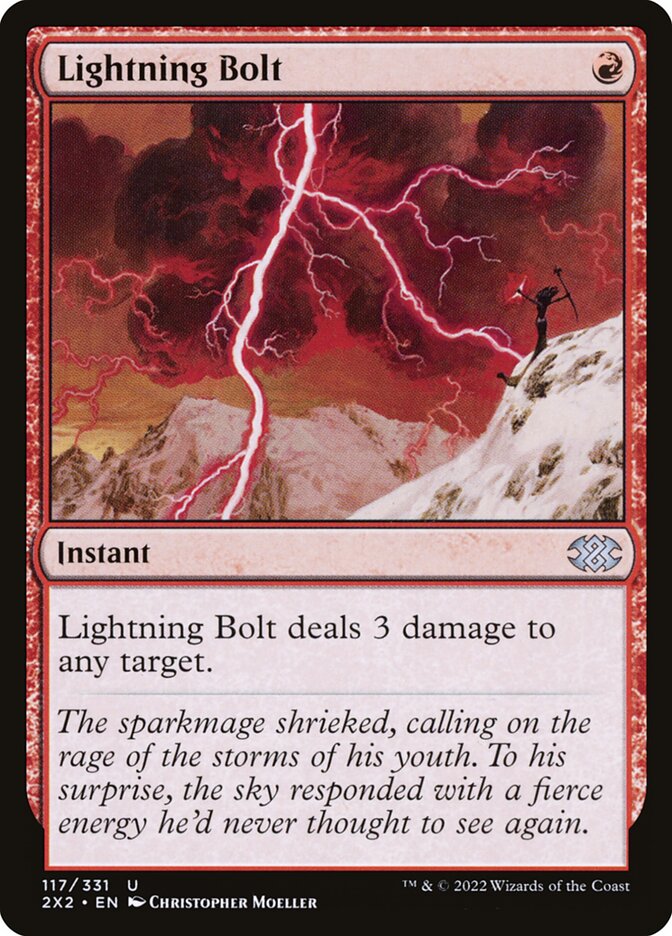
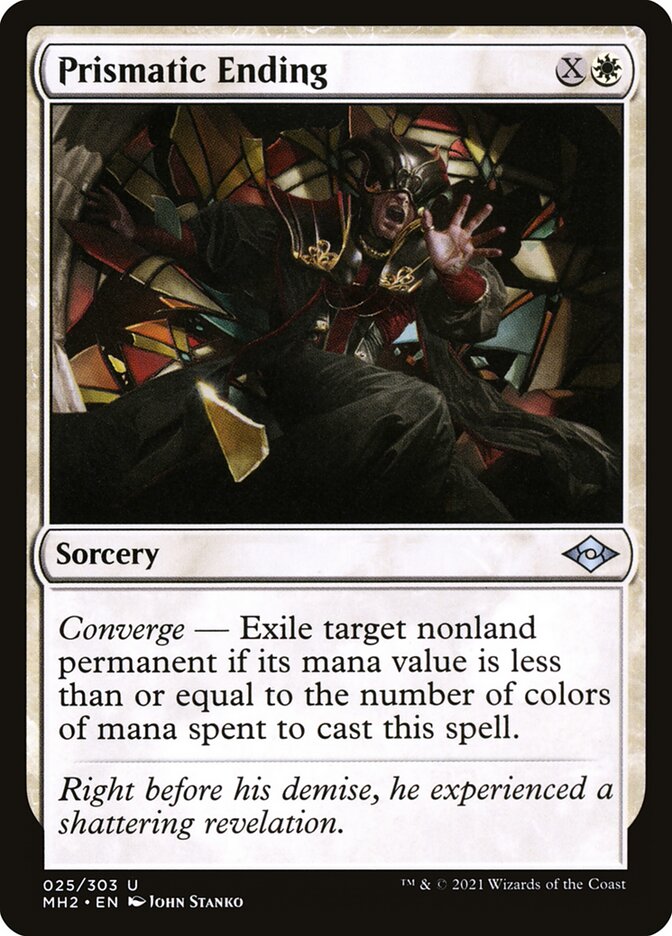
Lightning Bolt: We play four of these because it's currently the best one-mana removal spell. You need to be able to answer a Ragavan in the turns prior to Dwarven Mine being active, ideally at instant speed, which is why Bolt is preferable to Prismatic Ending. Additionally, you'll notice that many of the flex slots are also capable of dealing damage to the face, as does Archon and Wrenn and Six, which means burning your opponent out is not an uncommon way to close the game.
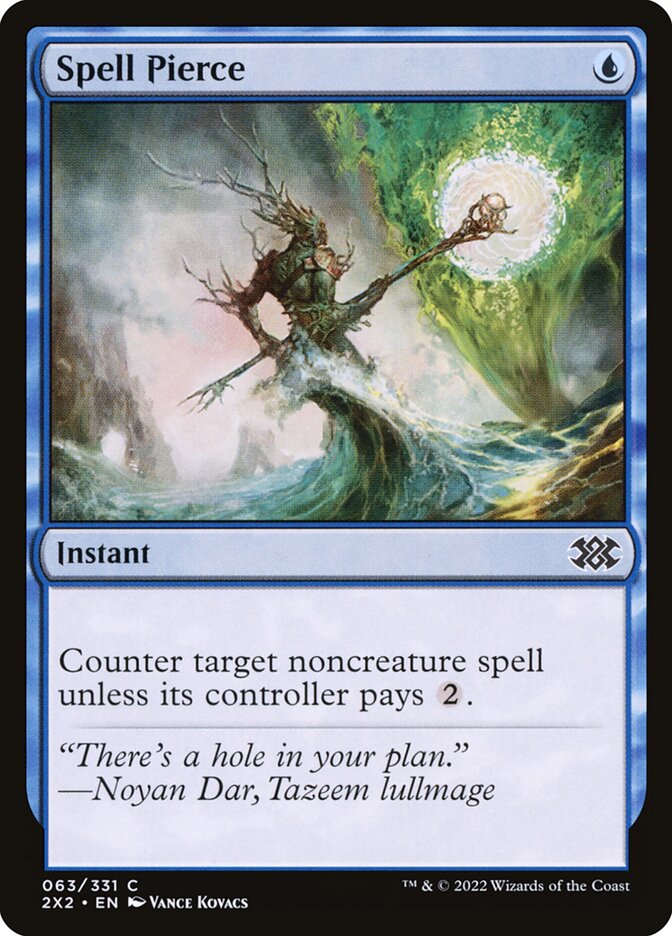
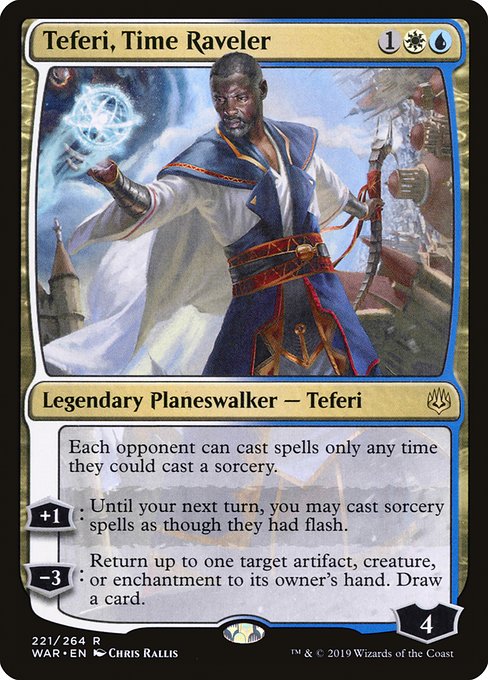
Spell Pierce: This card is so important because it fights on two fronts, dealing with opposing non-creature threats, which tend to be quite scary (Sigarda's Aid/Colossus Hammer, Teferi, Time Raveler, Wrenn and Six, and, worst of all, Blood Moon) and also protecting your own Creativity from countermagic on the turn you're trying to go off.
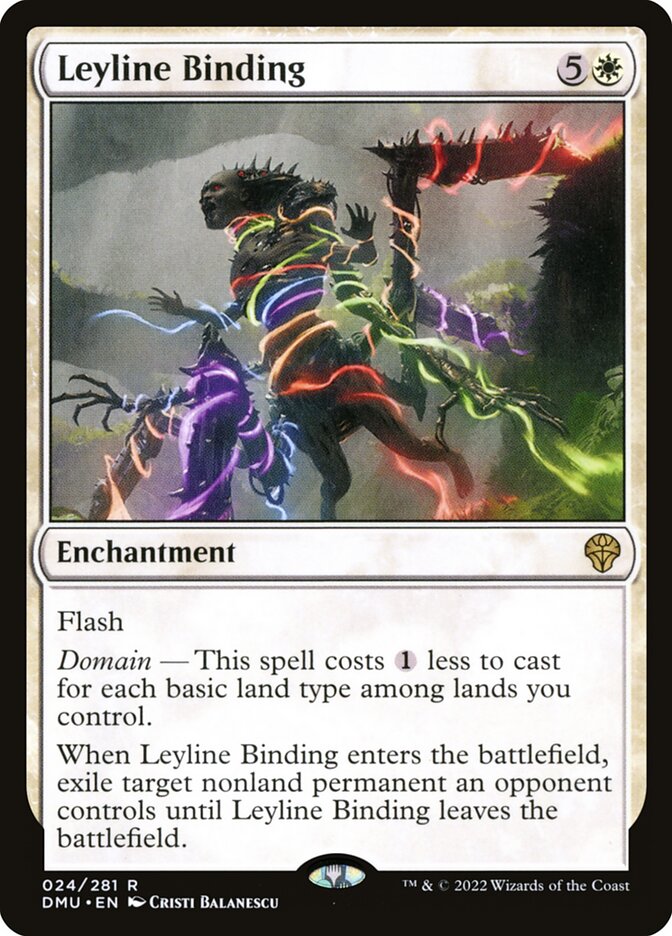
Leyline Binding: The ultimate removal spell – a one-mana instant that answers anything. This is one of the biggest draws to 5C Creativity, and a powerful enabler of its ability to play as a control/combo deck.
It's not an accident that we are playing so many one-mana spells. Aside from one-mana spells being great in Modern, our lands are often coming into play tapped, particularly on Turns 1 and 2. In order to turn on Leyline Binding with Triomes and not shock ourselves to death with Shocklands, we need to be able to interact with extremely high efficiency. One-mana spells allow us to do that. Turns 3-6 are where we're deploying threats, and the ability to deploy a threat with a mana value of n-1 on Turn n while holding up a way to interact is something to play toward.
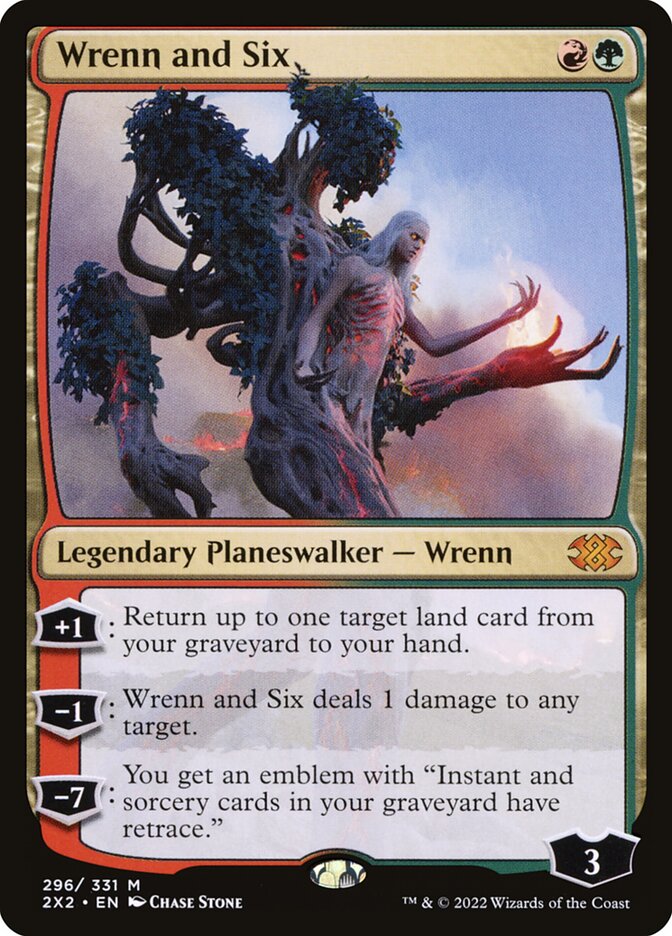
Wrenn and Six: In Creativity, Wrenn and Six plays an important role because our land count is low for a deck that wants to be consistently spending five or six mana on curve. Additionally, 5C Creativity relies on fetchlands arguably more than any other deck in Modern. Every land in our deck needs to be a Mountain, yet we're also trying to cast all five colors of spells, sometimes with double pips or double-spelling two cards of the same color. Not only that, but fetchlands grab the Dwarven Mines which form the backbone of our deck. In most matchups, when deciding whether to mulligan your hand, Wrenn should push you strongly to keep.
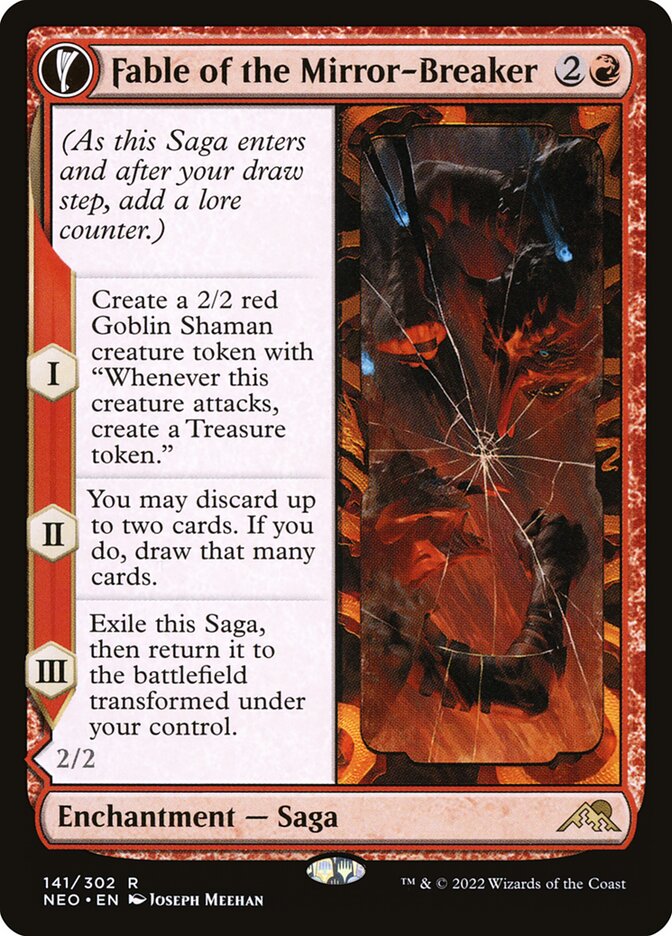
Fable of the Mirror-Breaker: Fable is so good because it clears the way for a Creativity. The Goblin Shaman token will draw a removal spell that would otherwise be saved for a Creativity target. If the Shaman lives, you have a Treasure which is easier to Creativity than a creature. Chapter two digs you to a Creativity or a way to protect it, and Chapter 3 again draws removal spells, gives you a second body (for free) to target with Creativity, and has a mana value of 3, dodging Engineered Explosives, Hidetsugu Consumes All, and Ratchet Bomb/Filigree Sylex. Fable is so good because it's both a proactive threat and a way to protect your Creativity.
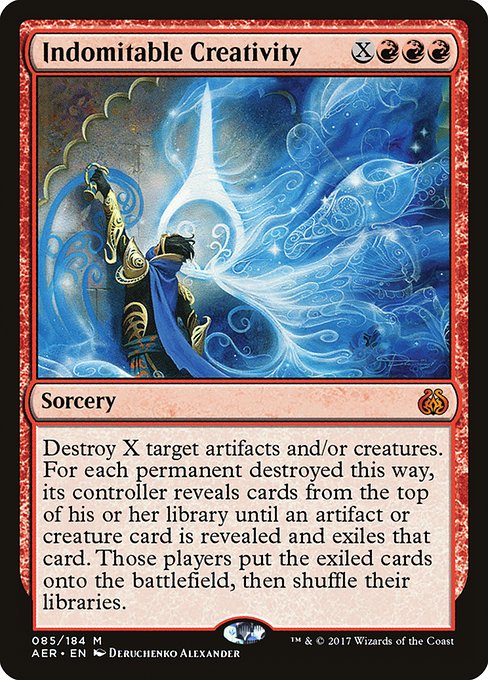
Indomitable Creativity: Yes, we want four of our namesake card for fairly obvious reasons.
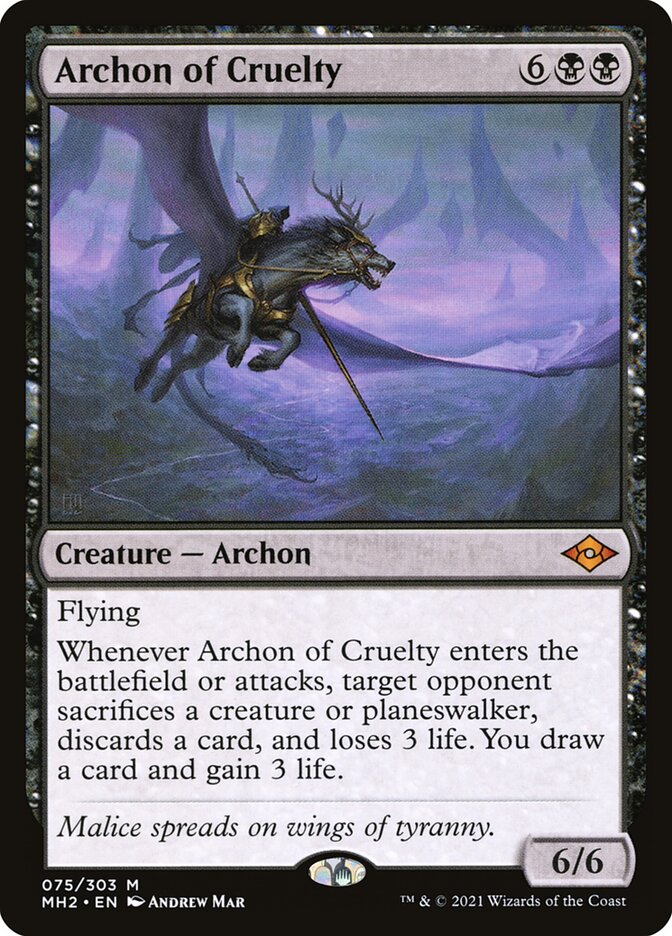
Archon of Cruelty: Games with this deck can go very long, and you typically would like to have at least two Archons in your deck to Creativity into. Thus, you cannot safely go below three. (I prefer four.)
Mainboard – Flex Slots
4th Spell Pierce
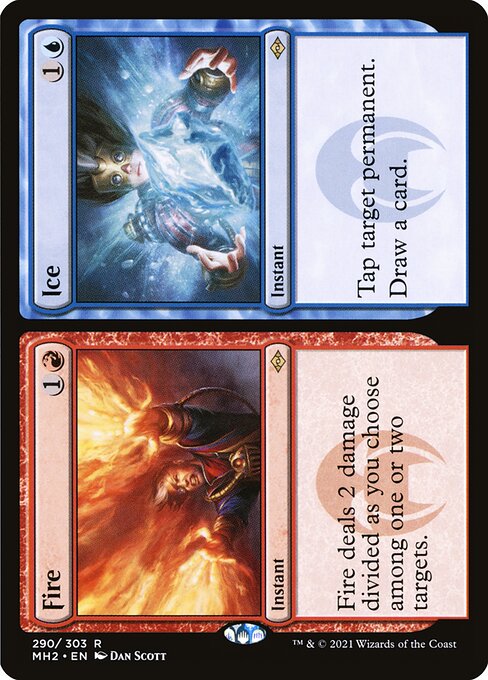
Fire // Ice: This card is the height of flexibility, and is never dead. It can be a below-rate kill spell that sometimes nabs two Esper Sentinels or two Dragon's Rage Channelers. It can be a way to preemptively tap your opponent's lands on end step to push through a Creativity, tap down a Murktide or opposing Archon, tap an Urza's Saga on upkeep to shut off the Construct, the applications go on forever. Its floor is “fine,” and its ceiling is a complete blowout.
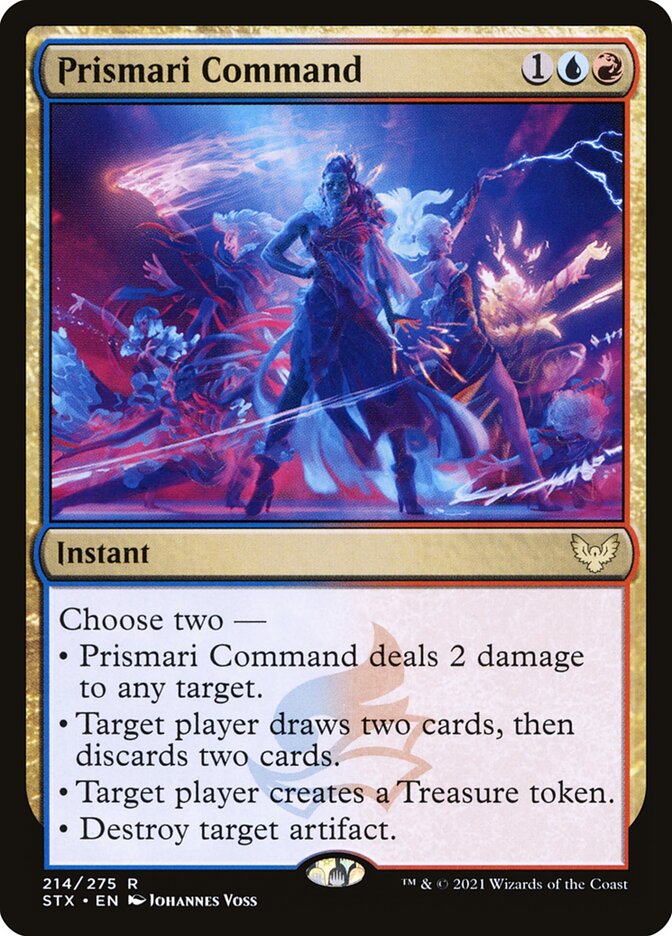
Prismari Command: This is a bad card. It is telling that no deck in Modern other than Creativity plays this card. The only reason Creativity plays it is because the “Create a Treasure” mode is desirable, and it's the best “Create a Treasure” instant we have access to. If you approach Creativity as a tempo deck, then you don't care so much about the card disadvantage that often comes from choosing the “Create a Treasure // Draw two, discard two,” but playing 5C Creativity as a control deck means praying that you can recoup the card you spend on the Treasure or the looting.
4th Spell Pierce: If your metagame is heavy on creature decks, you likely don't need four. Though four can sometimes feel like overkill, the best cards against you tend to be non-creatures (Blood Moon), and it's worthwhile hedging against this because you're so good against everything else.
4th Archon of Cruelty: It really, really stinks to draw Archon of Cruelty in the early game, and the more you play, the more likely you are to draw not just one, but more. On the other hand, the more you play, the more likely you are to have more left in your deck in the late game as well, leading to a real tension between 3 and 4. Creativity has the tools to survive to the late game, and it has ways to filter its hand (Fable, Prismari Command), so I haven't found it to be too problematic to play four. Additionally, there have been too many instances in which I end up with only one or two Archons in the deck, and am very grateful that I'm playing four.
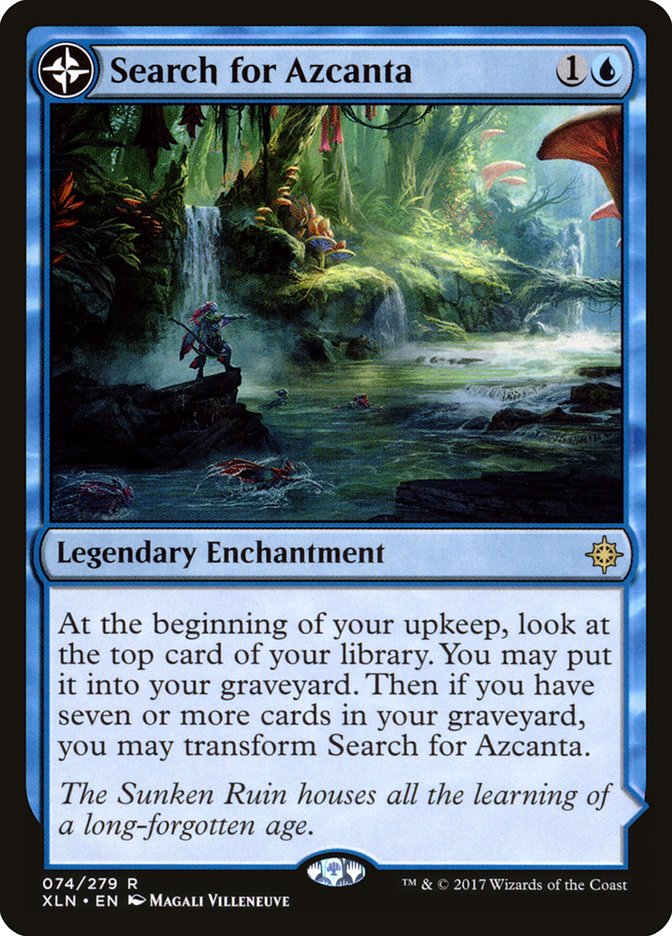
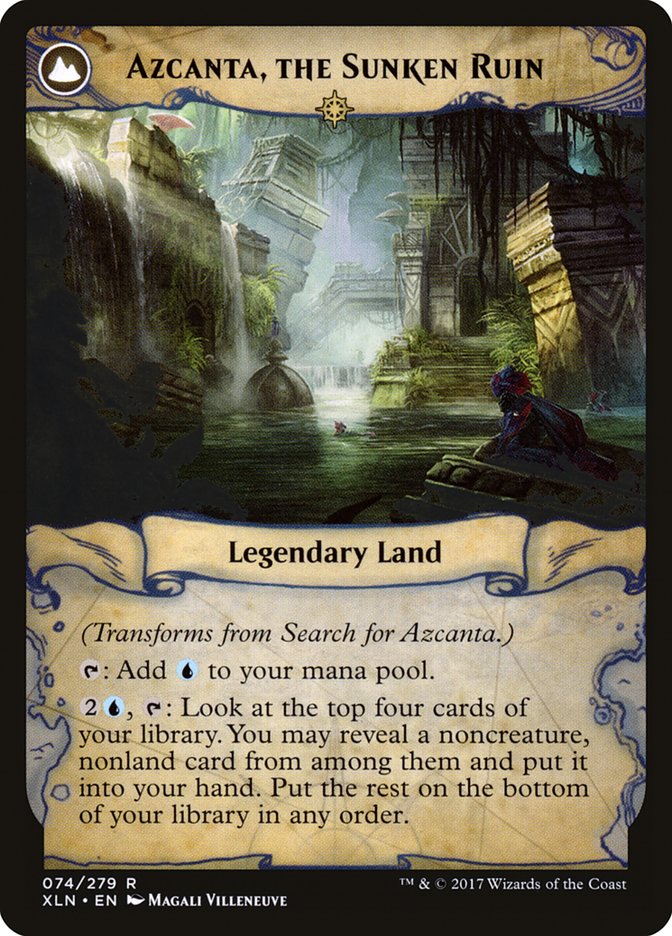
Search for Azcanta: This is a weird one, and maybe I'm just totally wrong. Wrenn and Six is enormously helpful to Creativity because the deck doesn't play enough lands, and Wrenn fixes that. Additionally, the deck sometimes does the opposite – if you have an active Wrenn and find yourself drawing lands, you're extra sad. Search for Azcanta acts as a bad Wrenn and Six number Five on Turn 2, where it smooths your draws, finding whichever card type you need. Because of your large number of fetchlands, cheap interaction, and looting, you fill your graveyard quickly, which means Azcanta regularly flips around Turn 4 or 5, which is conveniently the turn you'd like to Creativity with protection up, something that the extra Blue-producing land enables. In the late game, Azcanta flips immediately and allows you to pull ahead by grabbing removal, planeswalkers, and Creativities out of your deck, since over half your deck is non-creature spells. When I was playing Creativity, I wanted one more card to do a Wrenn-like smoothing of lands, and I also wanted one more card to generate additional card advantage and dig through my deck in the late game; I've been pleased with Azcanta filling both roles proficiently.
Because I approach 5C Creativity as a control deck, I tried to tune my deck to minimize the “bad cards” it plays. Archon and Creativity you're stuck with, but I really dislike Prismari Command and Persist. Persist does nothing unless you have an Archon in the yard, which encourages you to play cards like Bitter Reunion, which also do nothing, to put an Archon in the yard. Spending mana and cards to not interact with the board or pull ahead on cards is not something I want to spend time on in a control deck. This is what leads me to build 5C the way that I do. (Though also considering cutting Prismari Command altogether for a fourth Teferi.)
The manabase is mostly stock, but the one decision is on which pair of Triomes you play.
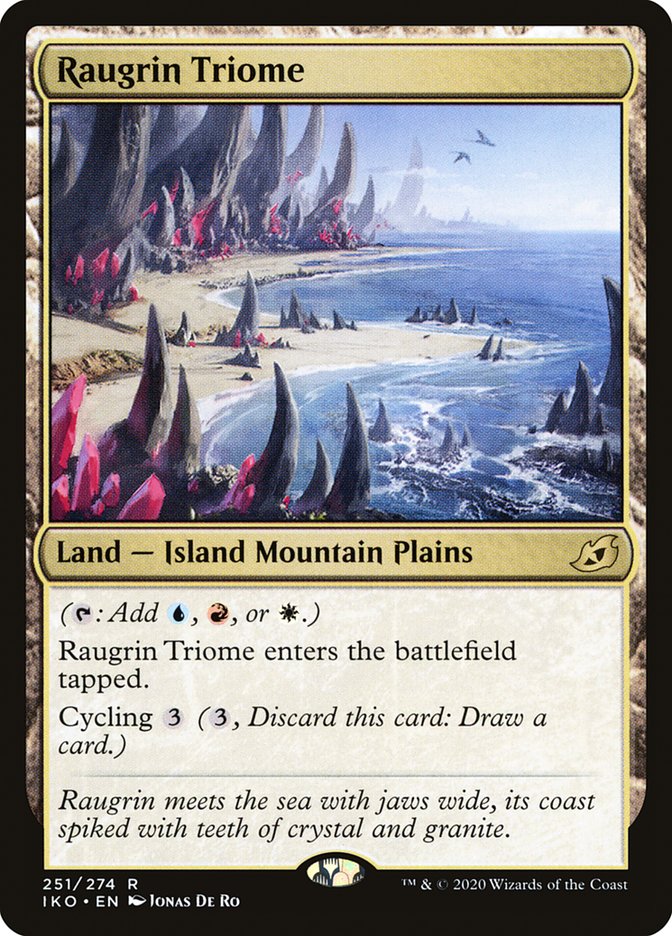
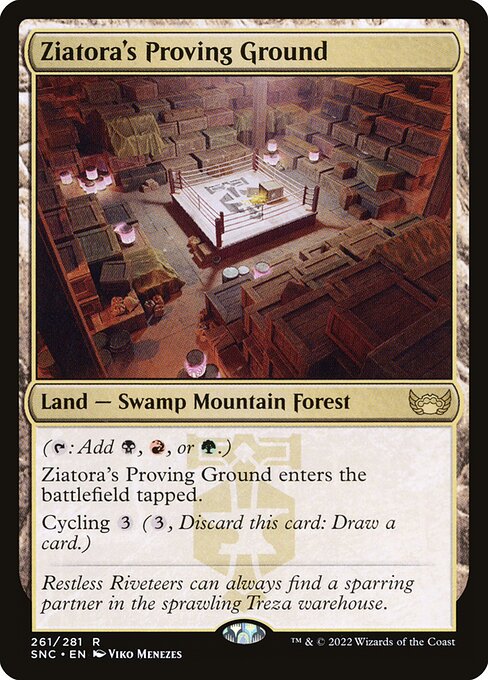
Raugrin Triome + Ziatora's Proving Ground: This is likely the best combination if you are not playing Teferi, Time Raveler (which I wouldn't recommend). Fetching Raugrin on Turn 1 and Proving Ground on Turn 2 allows you to cast every one-mana spell in your deck on Turn 2. However, it does not allow you to cast Teferi on Turn 3 unless you have another fetchland, as the White and Blue mana are on the same land. One solution to this is to play a Raugrin Triome alongside two other Triomes that split Blue and White and make all five colors, but additional taplands aren't great, and they're coming at the expense of either a fetchland or a basic Mountain, both of which are valuable.
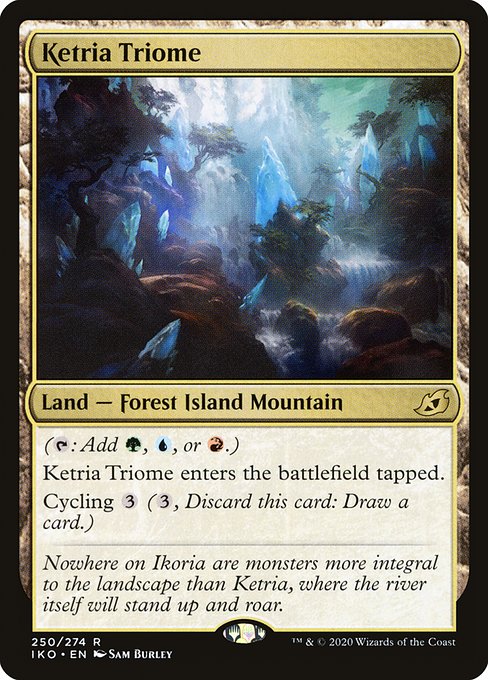
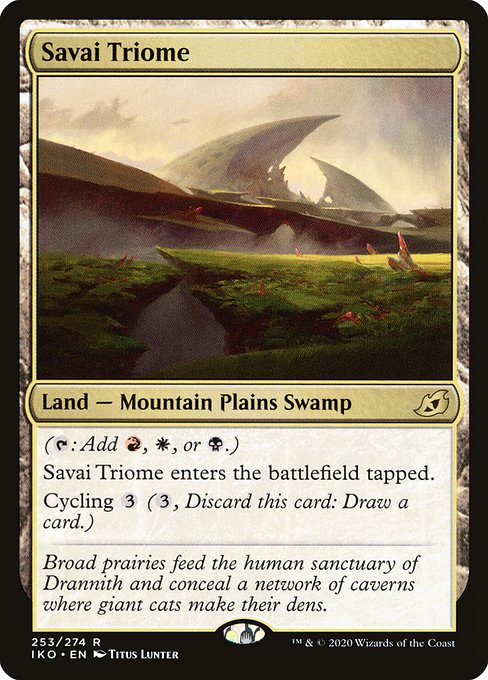
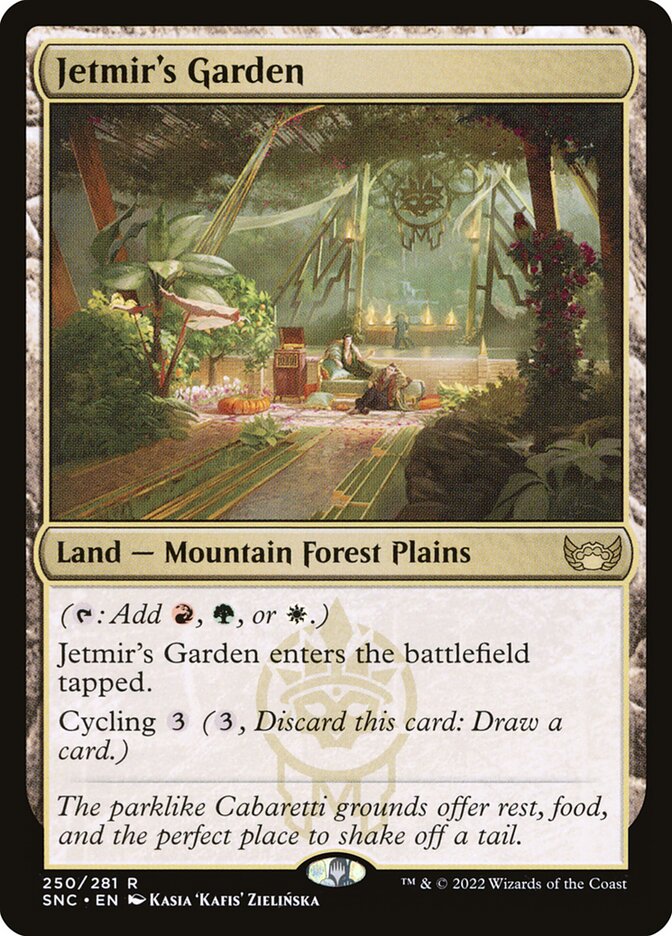
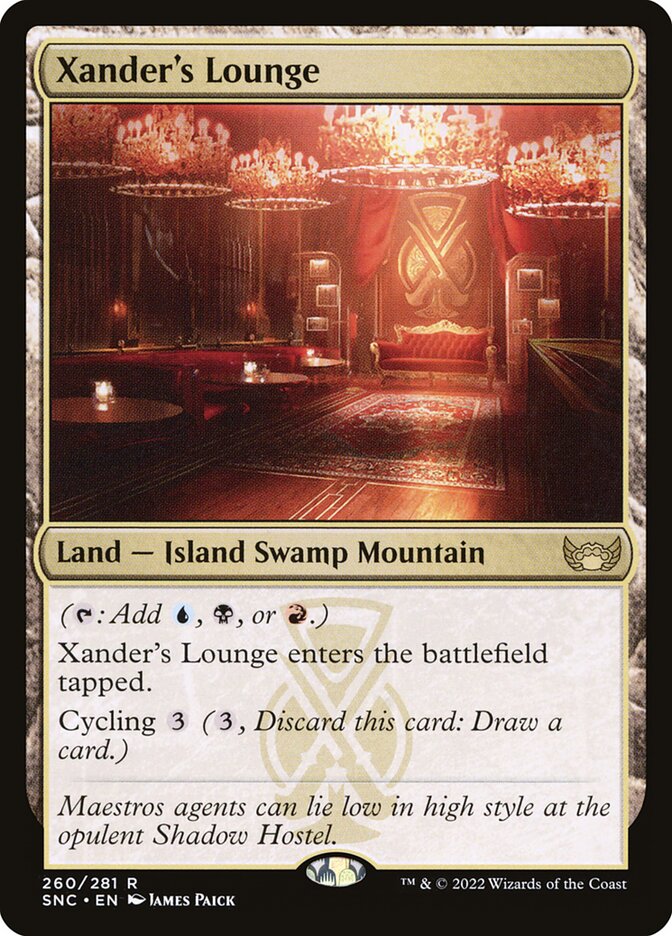
Ketria Triome + Savai Triome // Jetmir's Garden + Xander's Lounge: With no Persist, you don't need Black mana until late in the game, which means the choice of Jetmir's vs. Ketria comes down to whether you'd rather have access to Leyline Binding or Spell Pierce on Turn 2 if you fetch your second Triome. (You need it to be a RGx Triome to maximize your ability to play Wrenn on Turn 2.) If you're playing fewer than four Spell Pierce, you should almost certainly play Garden. I personally lean toward Garden/Lounge, prioritizing Binding over Pierce. Admittedly, this can sometimes be awkward; if you're forced to Pierce on Turn 2, you need to fetch Steam Vents, and once you've fetched Vents, you do not have a way to fetch an untapped Blue source. This means that if, on a later turn, you'd like to cast Teferi and hold up Spell Pierce, you won't be able to do that if you haven't fetched Lounge on Turn 3.
Once you select your Triomes, the rest of the manabase builds itself:
1 Jetmir's Garden
1 Xander's Lounge
1 Mountain
13 Red Fetchlands
Gameplay
Do Not be Afraid to Mulligan With This Deck
Keep in mind that seven-card hands with an Archon are closer to six-cards anyways, and that any six-card hand you mulligan to has the option of bottoming an Archon, thus being mostly equivalent to a seven-card hand.
Fetch Thoughtfully

Though the default is to start on Jetmir's Garden and then get Xander's Lounge, there will be exceptions. For example, if you're playing against a deck where Spell Pierce is important, and your hand contains only a single Fetchland and no Steam Vents, then you very likely ought to fetch Lounge.
In the early game, the ideal sequence is to start on Garden, then grab Lounge if you don't have Wrenn and Steam Vents if you do have Wrenn. After that, you prioritize setting up Lounge and Sacred Foundry so that you have access to WWUU and can cast Teferi while holding up either Leyline Binding or Spell Pierce.
Remember that you only have one untapped source of each non-red color of mana. This means that if you anticipate wanting to hold up Spell Pierce on Turn 4 and you have yet to fetch a Xander's Lounge, you cannot fetch Steam Vents. Same thing goes for Jetmir's Garden and Sacred Foundry with Leyline Binding, though this comes up less often because you're more likely to start on Garden Turn 1.
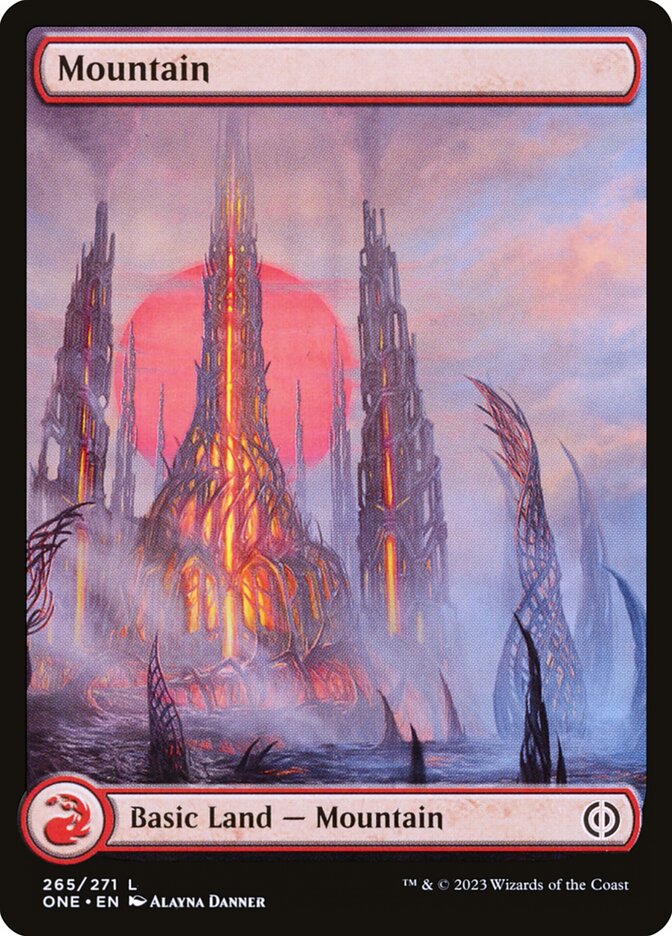
You have a basic Mountain in your decklist – use it! The Mountain might seem silly or only a hedge for Field of Ruin or something, but it's actually quite useful. Once per game, you get to fetch a land that doesn't deal you two damage if you need an untapped, non-color-specific mana source. Additionally, there will be instances in which you've fetched all of your shocklands and triomes, but don't yet want to expose a Dwarven Mine token – fetch your basic Mountain!
Do not fetch for no reason. It is common to leave fetchlands uncracked on the battlefield, particularly as the game goes long. In the later turns, you need to account for the possibility that you draw Creativity or the possibility that you're going to hardcast Archon of Cruelty. Or perhaps your opponent dashes a Ragavan, and you'd like to trade a Dwarf for it or a spell in their hand. Especially without a Wrenn to loop fetches, I usually leave late-game fetches uncracked, then crack all of them at once when my gameplan has been made clear.
You are Not in a Rush
You are playing a control deck. Sometimes, the opportunity to Creativity for X=2 on Turn 5 presents itself, and you get an easy win, sure. But do not cast Creativity, especially for X=1, if 1: there is a chance your opponent has an answer and 2: there is the option to do literally anything else, including waiting. Patience is vital – your opponent is unable to overextend or tap too much mana because your deck is mostly answers, so you're likely to have something, and, as was the case against Twin and Saheeli previously, there is always the chance that they just lose if they tap their mana. This gives you lots of room to operate, build up a hand, and look for alternate must-answer threats like Wrenn, Teferi, and Fable. Or simply sit around long enough to hardcast Archon.
Dwarves are Not Just for Creativity
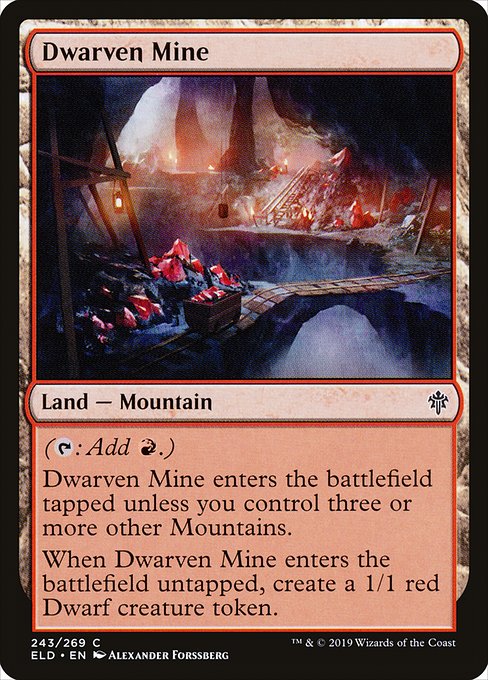
You get to crack a fetchland and get a free 1/1 four times during a game (sometimes less if you were stuck playing a Mine before Turn 4). It might seem weak, but it is absolutely not. The presence of an uncracked fetchland threatens to kill opposing Teferi's that have downticked, block Ragavans and Esper Sentinels, or turn into 1/1's that can stick enough damage to burn them out with Bolts. If your opponent kills your 1/1, congratulations, you have just gotten a free card, and your opponent has thrown away a removal spell that could've countered part of a Creativity.
Deploy Creativity Last
You have eleven non-Creativity cards in the deck that your opponent must answer, or they lose the game: Wrenn, Teferi, and Fable. All of these cards build up card advantage. My general gameplan with Creativity is to slowly wear the opponent down by forcing them to answer non-Creativity threats, all the while building up card advantage and controlling their board. Then, Creativity slams the door shut. If your opponent might have something, and you have the choice between Creativity and something else, do something else (unless you're going to die, obviously).
Beware of Discarding Archons
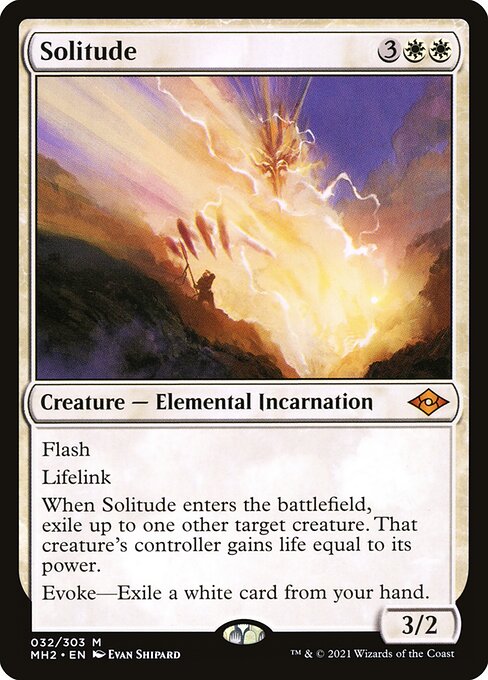
It's tempting to dump a hand of Archons for cards that do something when resolving Chapter 2 of Fable or a Prismari Command. Be very, very careful when considering this decision. If you have two Archons in hand, there is a real possibility that you will draw a third and be forced into a game where you're getting a single Archon each turn with either Creativity or hardcasting. One of the biggest changes I made in playing this deck was on this point. I used to auto-dump Archons, and now I'm extremely reluctant to ever discard more than one, and often I discard zero. If you are playing 5C as a control deck, you are likely to get into the late game, particularly if your opponent is trying to control against Creativity. Hardcasting Archon is the late game trump card that either forces them to act and exposes them to Creativity, or makes them lose when you tap eight mana. A lot of the interaction that stops Creativity (Flusterstorm, Spell Pierce, Lightning Bolt, even Solitude) either doesn't work or is much worse against an eight mana Archon.
Always Have a Plan to Win
Your opening hand should inform what type of game you're playing. A Wrenn/Teferi/Fable hand means you're slamming threat after threat, and Creativity will be an afterthought once the opponent reveals that they're out of answers by letting one of your threats stick. Are you aiming to ult Wrenn and Bolt them out? Then stop playing your fetchlands. Are you going hardcast Archon? Then prioritize fetching Blood Crypt and Xander's Lounge over Dwarven Mines. Your plan should change and evolve over the game, and you should try to leave yourself with maximum flexibility to pivot once that plan has been revealed.
Teferi Bounces Your Own Stuff
Do you have an empty Leyline Binding that ate a token? Bouncing it draws you two cards, a Leyline Binding and a random. Even better, did your opponent play out a second copy of a legendary creature or planeswalker that you previously Leyline Binding'ed? Bounce the binding, make them sacrifice one, then recast the Binding. Are you grinding hard, but out of gas? Bounce Fable to get another Goblin Shaman and another loot.
Creativity can Target Opponent's Stuff
Don't forget this. Especially with Elesh Norn becoming more popular, remember that she doesn't actually stop you, you just need to target her with Creativity in addition to your own stuff. Does your opponent have a big Murktide and a removal spell preventing you from going off? Target their Regent alongside your stuff, their other creatures stink. Missing an answer to a Hammer? Spin the wheel, maybe you get lucky.
Creativity Games are About Mana
Watch your opponent's mana very carefully to figure out if they have a Bolt or a Counterspell, a Leyline Binding or a Solitude. Beyond that, strain their mana. Use Teferi to bounce something that, if they replay it, they'll be tapped low. Spell Pierce something when they have exactly two mana up. Either you counter it, or they pay and you Creativity the next turn. If your plan is to cast Creativity, then your larger plan is to get your opponent to tap mana. However you can make them do that is fine, even if it leads to bizarre plays, like Spell Piercing into three or four lands, letting them pay, then Icing one of their remaining untapped lands. Every time your opponent leaves up mana, and you can deploy a non-Creativity threat, you should do it. It either pulls you ahead or uses up one of their answers for Creativity.
Matchups
UR Murktide

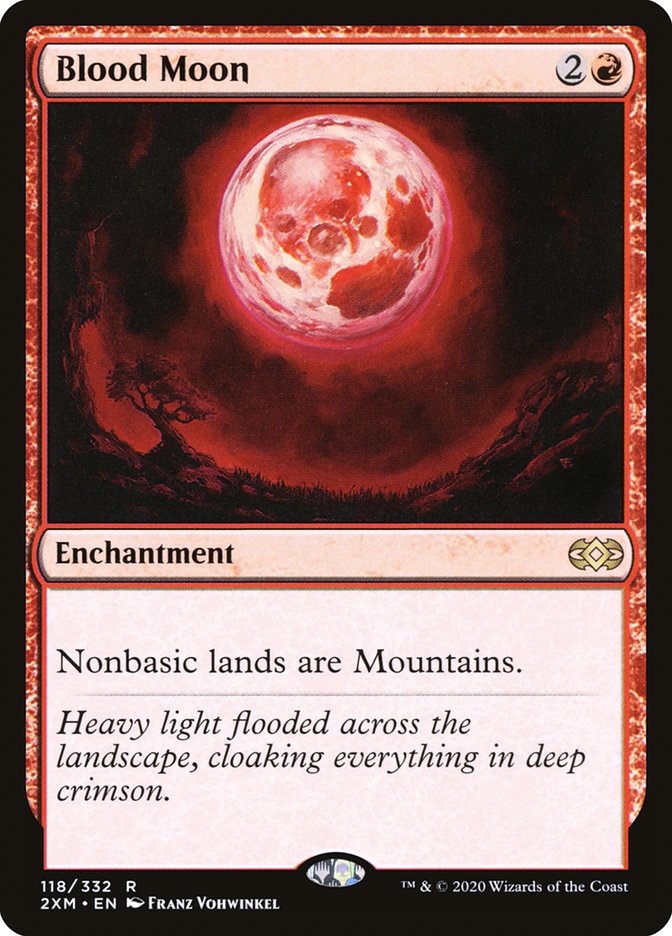
The scariest thing out of Murktide is Blood Moon, and it's not close. If you can play around it, you pretty much always should. The games you lose to Murktide are the ones where they deploy a Blood Moon quickly. Less often, you could also lose to an aggro draw with multiple DRC's followed by a Murktide.
But typical Murktide games require you to not lose by Turn 4, and if you go late, you will win. In a lot of ways, the games against Murktide are exactly the games you play best. As you go late, you will tend to have more lands than they will, which will allow you to set up multi-spell turns more effectively. Everything they do fails to trade up on mana; their Murktides get Leyline Binding'ed, their one- and two-mana threats also get answered by one mana. If you cast threats, they will eventually run out of answers, as any threat that sticks cascades into more card advantage.
Against Murktide, Dwarf beatdown is extremely real. Only Ledger Shredder and Murktide can profitably block a Dwarf, and because their creatures are so easy to answer, they nearly always need to spend a removal spell on a Dwarf token. You should aggressively try to trade Dwarf tokens with Ragavan whenever you get the chance.
Once you've controlled their board, do nothing. Draw go is where you want to be. The onus is on them to win the game, otherwise you have inevitability. They need to answer every single Wrenn, Fable, Teferi, and Dwarf that you have, and if they fail, they lose. Azcanta will allow you to build up enormous card advantage and craft a perfect hand, and they can't interact with the land at all. Once they tap mana to answer these threats and/or deploy their own, you can usually find a spot to go for Creativity with protection.
Sideboard
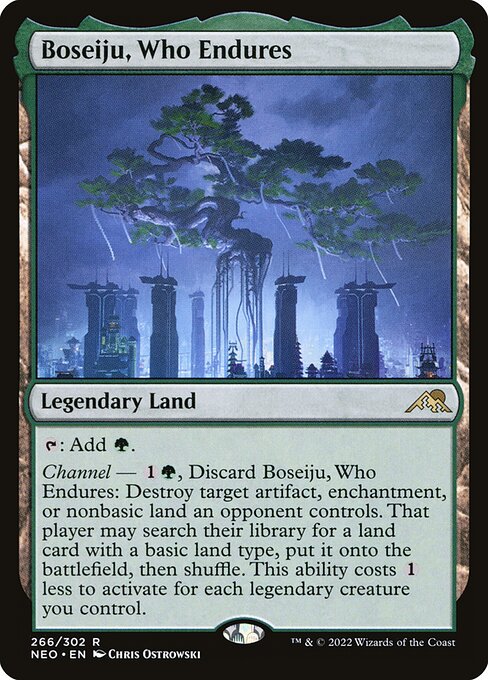
+2 Boseiju (unless they're not on Blood Moon)
-2 Fire // Ice (unless they're playing Spelldancers)
Post-board, nothing really changes. Your gameplan is exactly the same, except now they have Engineered Explosives, Flusterstorm, and Dress Down, none of which change the fabric of the gameplay. EE costs two mana to activate, which strains their mana more than their one-mana removal spells. In the face of EE, just attack them with Dwarves and Shamans until they're forced to pop it to not die. At that point, you've likely done enough damage that the next Dwarf will get the job done. Or the next. Or the next.
Remember to aggressively play around Blood Moon. In the later game, when you're at five or six mana, you can float White and cast Leyline Binding for 5 to answer it as well.
You have inevitability in this matchup, so just be patient, deploy threats slowly, strain their mana, and then kill them when they tap too low. At some point, they're going to have to fight over you trying to kill one of their threats – happily engage, and Spell Pierce back. It'll be a lose-lose for them.
5C Creativity
This is a control mirror, so you very much need to hit your land drops. If your opponent doesn't understand that it's a control mirror, you're very likely to win. You typically want to avoid casting Creativity first if your opponent will be left with a hand, as they'll be able to Creativity on their turn and wipe out your Archons. I generally value Spell Pierce quite highly in the matchup, so if I have a Dwarf and a Bolt that could answer a Teferi, I'll happily take that over Pierce. Wrenn is the main “always Spell Pierce” threat.
If a player can stick a Teferi, that player will be heavily advantaged. You can uptick Teferi, cast Creativity on your opponent's end step, then attack with the Archon(s) on the following turn.
The Goblin Shaman token that Fable creates is something you want to Bolt immediately. Treasure is harder to interact with, so if one player is able to build up Treasures, they'll have an easier time resolving Creativity. Additionally, mana advantage is huge for this deck, so you don't want to let your opponent do that, but you'd very much like to. Even better than Bolt is Teferi, as that creates a game object that your opponent must answer while also answering their Treasure-maker. Because they need to tap mana on their turn to answer Teferi, you can usually snowball a resolved Teferi into another resolved threat.
If you find and flip Azcanta, you're also favored – the mana and card advantage generated by the Sunken Ruin is hard to beat.
Sideboard
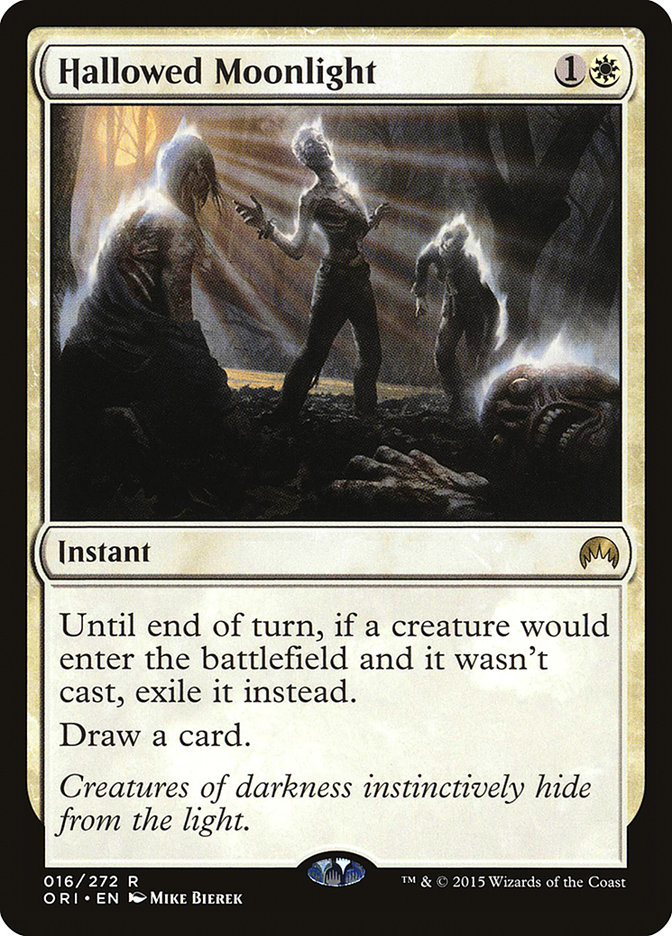
Post-board, Teferi is still the key to resolving Creativity. Otherwise, Hallowed Moonlight is pretty much unbeatable. This means if you have it, you can feel comfortable, pressure your opponent, and try to put them in a position where they're forced to go for Creativity to come back. The gameplay here is similar to other grindy decks – the way to win is by straining the opponent's mana while deploying non-Creativity threats. If they ever tap too low, win with Creativity.
Additionally, keep an eye on their number of cards in hand. If you can resolve a Creativity that empties their hand, then you can safely ignore the “don't Creativity first” rule.
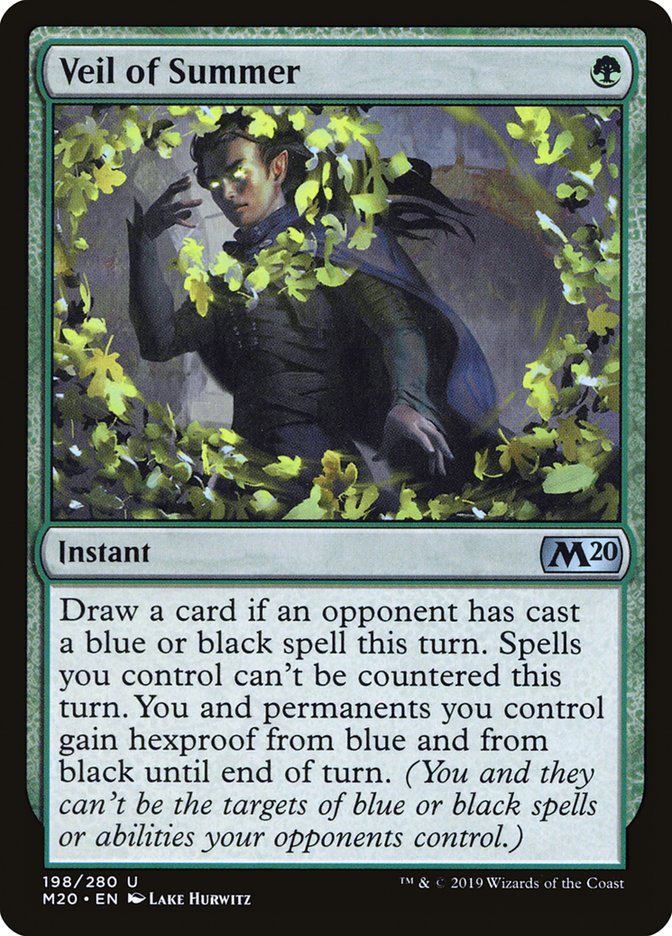
Finally, if your opponent does stick Archons, you have some options. First off, you can semi-play around it if you have a planeswalker or a creature you don't want to sacrifice by fetching Dwarven Mine in response to the trigger. If you have Veil of Summer, that can blank the Archon trigger for one turn and give you a window to Creativity back and win. Bouncing Archon if your opponent is low on mana is fine, but Leyline Binding is risky, as your opponent can Binding your Binding and get another trigger.
Some Creativity players board down to three Archons post-board. This gives you the nuclear option of casting Creativity on their Archons, hoping they have one in hand, and simply killing both (or one). If you were tapped out (bad!) or drew the Hallowed Moonlight the next turn, you can cast Creativity on their Archons, hold priority, cast Hallowed Moonlight, and exile all the creatures in their deck from the game, which is pretty sweet.
RB Scam
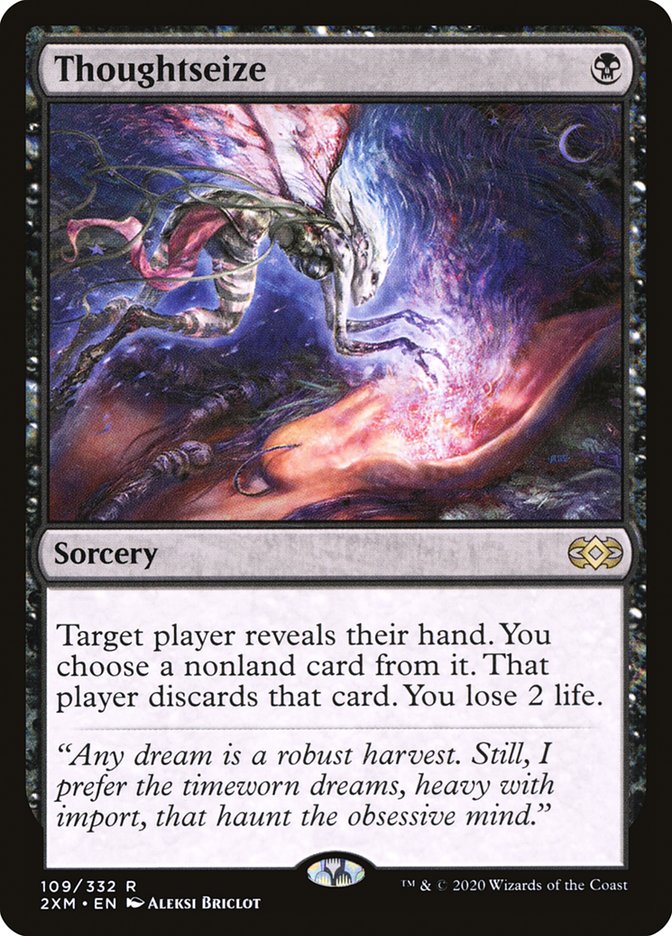
Scam matches vary wildly from match to match. If they have a fair start, with Ragavan and Thoughtseize and Dauthi Voidwalker, it's pretty easy to outgrind them. Without countermagic, every resolved threat will put you up on cards, so eventually you'll pull ahead.
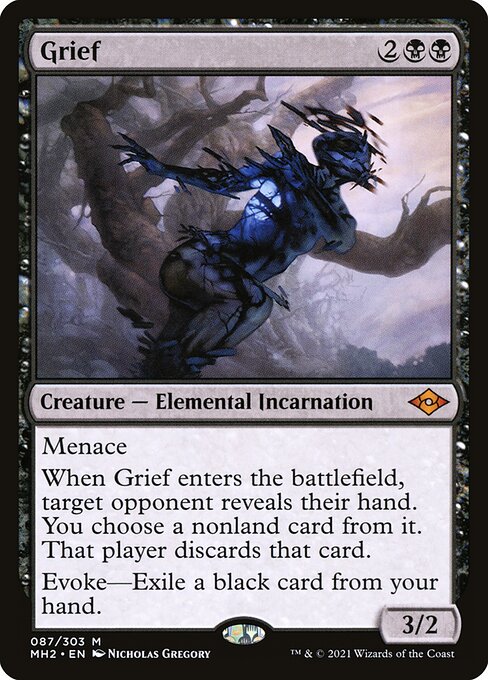
If they have an unfair start with Grief, then it depends whether or not you find an answer to the Grief. If you don't, you lose. If you do, you both go into top-deck mode, and that generally favors you, as every threat puts you up on cards.
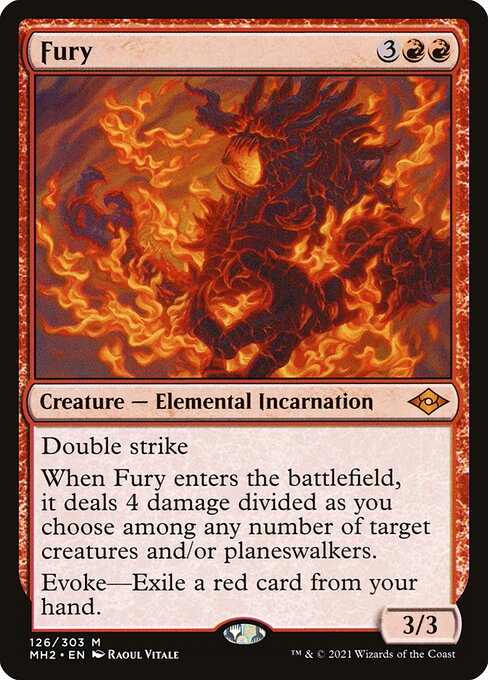
If they have an unfair start with Fury, you still lose if you don't have an answer, but if you do have an answer, you will easily win, as they've spent three cards to trade for your one Leyline Binding.
If they play Dauthi Voidwalker on Turn 2 and haven't cast a hand disruption spell, you need to kill the Dauthi if you've drawn an Archon.
As is the case with Murktide, you will likely lose if they stick Blood Moon. This, too, is about mana – if you can stall them from playing Moon by playing a Fable or Teferi that they need to answer first, or Ice a land on upkeep, do it. Anything you can do to delay the Moon buys you more windows to create game objects and win with Creativity.
If you resolve Creativity, you are exceedingly likely to win. They only play a couple Terminates, and they tend to have few cards in hand, which means an Archon leaves them on empty.
Sideboard
+2 Fury
-1 Fire // Ice
Post-board, they'll have Necromentia, additional Moon effects, and Engineered Explosives. If you're very concerned about Blood Moon, you could bring in 2 Boseiju for an additional Teferi and Fire // Ice. Necromentia isn't a big deal, as them taking a turn to do absolutely nothing should allow you to pull ahead pretty easily and win with Furies, Bolts, and Fables. It's also pretty easy to trade up on mana with Necromentia with Pierce or Veil.
Hammer
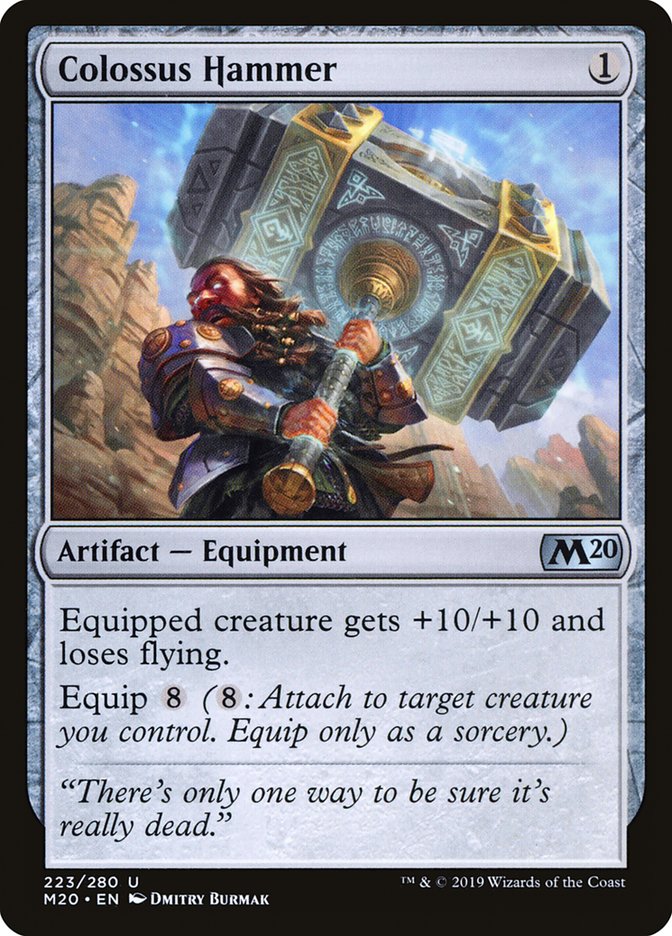
This is one of the matchups where you lean the hardest into the control role. Answer everything, and, if possible, do not expose yourself to getting got by tapping out. If you know you're playing against Hammer, mulligan any hand that does not have interaction, ideally at least two pieces. Their individual cards are terrible, which means that if you can stop the combo, you will pull ahead.
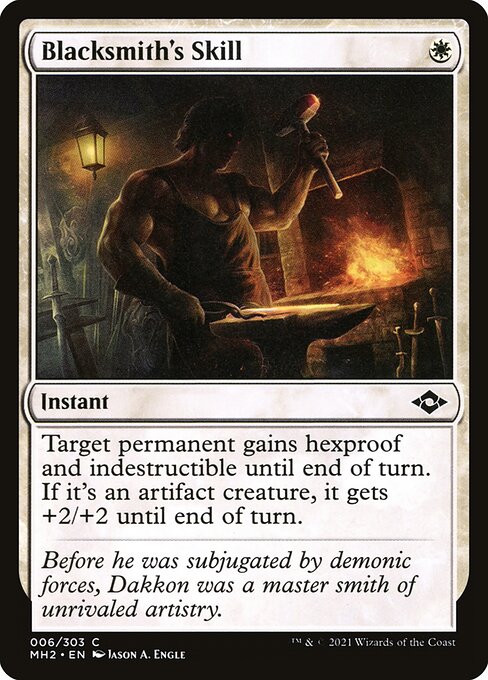
The cards you want to be the most cognizant of are Blacksmith's Skill and Spell Pierce. If you're counting on a single removal spell to get the job done, you're asking to get blown out. Again, be patient – try to ensure that you can always cast two removal spells, or a removal spell and a Counterspell. It shouldn't be hard given how cheap all your cards are. Also keep in mind that Blacksmith's Skill can target one of your Creativity targets, giving it indestructible and blanking the spell. The pre-board game is tougher than post-board, as you risk having too many clunky three-drops against their fast starts.
Sideboard
+2 Boseiju, Who Endures
+1 Wear // Tear
+2 Fury
-2 Spell Pierce
-1 Fire // Ice

Post-board, you have so much interaction that it becomes nearly impossible for them to string together a combo kill. They pick up very little from their sideboard to fight you. Additionally, Fury is excellent, as you can Evoke it, wiping threats out while leaving up additional answers or deploying your own. Post-board games can become low-resources, as your multitude of answers trade one-for-one. You are advantaged because, as the game goes long, you will have more mana than they will, which means you will be able to deploy threats while protecting them or holding up answers.
Rhinos
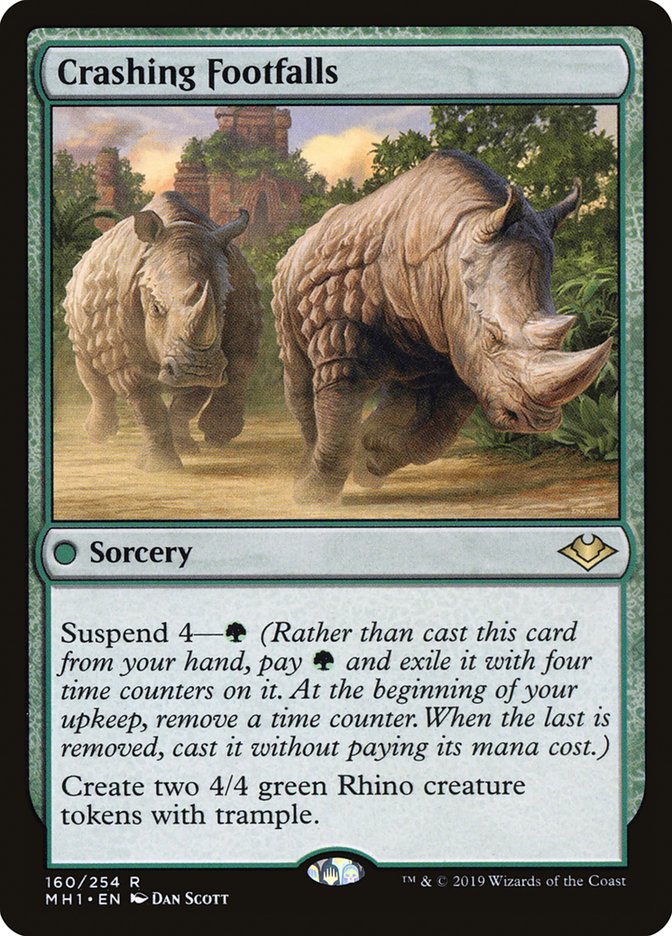
In Game 1, the matchup is pretty dependent upon who has countermagic. They struggle to beat one Archon, especially if it's post-Crashing Footfalls, and two is nearly impossible. They can bounce them, sure, but the card advantage should put you far enough ahead to win the game. If possible, refrain from fetching Steam Vents so that an uncracked fetchland, which they can't Ice, will always be available to Spell Pierce a Footfalls.
Sideboard
As is so often the case, the Blood Moon effects are the scariest thing post-board. Luckily, you pick up Hallowed Moonlight and Veil of Summer, which are excellent at combating their combo turns, and Veil does a great job of protecting your own.
Sometimes the games go very long, as both players work to craft their hand, hit land drops, and position. You should win these games, as if you start hardcasting Archon of Cruelty, they can no longer win.
Elementals
Game 1 against Elementals needs to go perfectly for them or they will lose. If the Elementals player does not curve Wrenn into Teferi followed up by Omnath or Fury, they're probably dead. They have no meaningful interaction in Game 1 outside of Solitude, which is easy to play around and still puts them down cards. If you can stick a Teferi and they don't Prismatic Ending it, then you also win.
Unless they're doing their super curveout and you're under a lot of pressure, be patient. Almost nothing they do in Game 1 matters, so you can just build up a board, hit land drops, then Creativity for X=3 and kill them. If they find Elesh Norn, just be sure to fetch Dwarven Mines in response if you're planning on targeting the tokens, and then target Norn in addition to your tokens.
Sideboard
Post-board, you're still favored, but you need to watch out for Magus of the Moon and be cognizant that they're likely to have Flusterstorm and Orvar. For all the hubbub around Orvar, it's not actually very difficult to beat and fairly easy to sniff out. Orvars in hand are often correlated with not many meaningful game actions being taken by the opponent and some of your non-Creativity threats sticking, as your opponent is essentially playing down a card. If this is the case, just keep pressuring them, then figure out how to deal with Orvar. Your options include:
- Veil of Summer blanks the Orvar trigger when they target your Archon
- Use Teferi to bounce the token copy
- Use Teferi to instant-speed the Creativity so that you get to attack first
- Leyline Binding the token copy
- Build up such a significant board that the token copy doesn't really matter
Burn
If Burn is popular in your area, probably don't play Creativity, or add Weather the Storm and/or Blossoming Calm to your sideboard. This is the one matchup that I am most unhappy to see when I sit down.
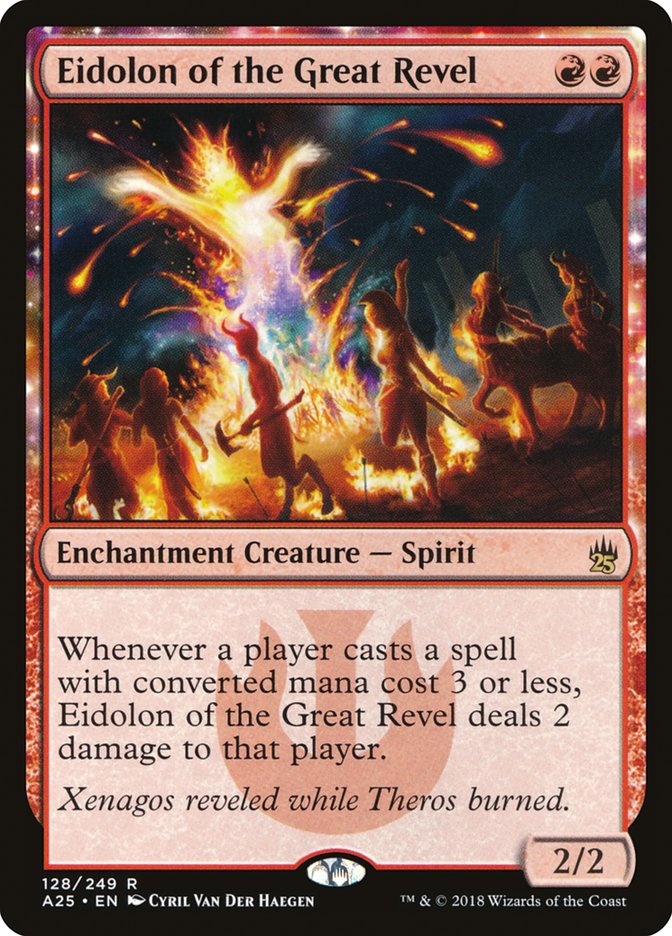
Against Burn, try to minimize the amount of damage you take off your lands, even if that means playing off-curve (which it almost always does). Fetch your basic Mountain to conserve life, and try to spend Leyline Binding on Eidolon of the Great Revel. Your best bet is for them to tap out for some reason (or with your help via Ice) so you can resolve a Creativity, or to get Treasure and Creativity that. On the bright side, if you resolve Creativity in Game 1, you're almost guaranteed to win. On the not-so-bright side, it's very hard to resolve a Creativity against a deck consisting entirely of Lightning Bolts.
Sideboard
+2 Turn the Earth
+2 Fury
-1 Fable of the Mirror-Breaker

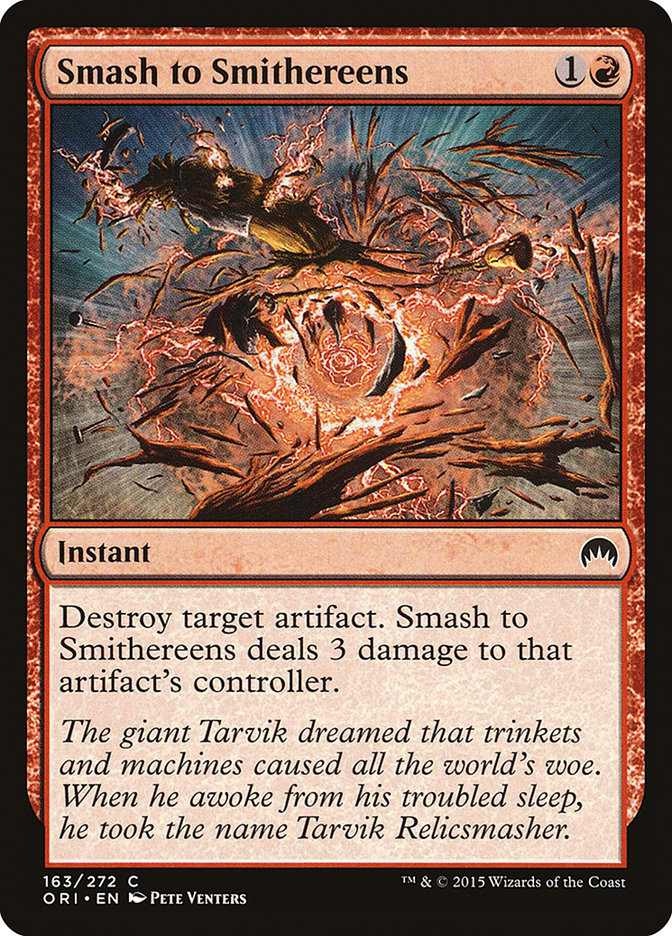
Post-board, even your Treasures may not be safe due to Smash to Smithereens. Against Burn, you need to be doing something impactful every time you tap your mana, which means this is the one matchup where I cut Wrenn and Six. If you can contain their early creatures and cushion your life with Spell Pierce and Turn the Earth, then you might be able to get there with a Fury or a well-timed Creativity, but you are still quite unfavored.
Amulet Titan
On the bright side, they have almost no interaction against you in Game 1. Unfortunately, they are capable of far more explosives starts than you are. That means that your goal against Amulet is to not die on Turns 2-4. If you can pull that off, you're likely to win by casting Creativity for X=2. This means doing everything you can to prevent them from casting a fast Titan. Prioritize answering their Amulets, use Teferi to bounce their Urza's Saga or Dryad. If you draw the wrong half of your deck (the threats), you're in trouble.
Sideboard
+2 Boseiju, Who Endures
+1 Wear // Tear
Post-board, you're much better-positioned to execute your gameplan. Not only do you gain access to relevant one-mana interaction, but you also pick up the Wrenn + Boseiju loop. By itself, it won't win you the game, but this matchup is all about buying yourself enough time to do your thing. You should still prioritize answering their Amulets and Sagas.
Yawgmoth
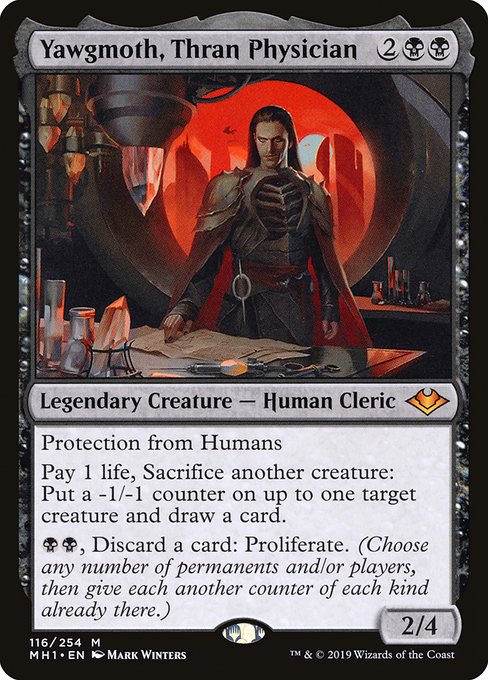
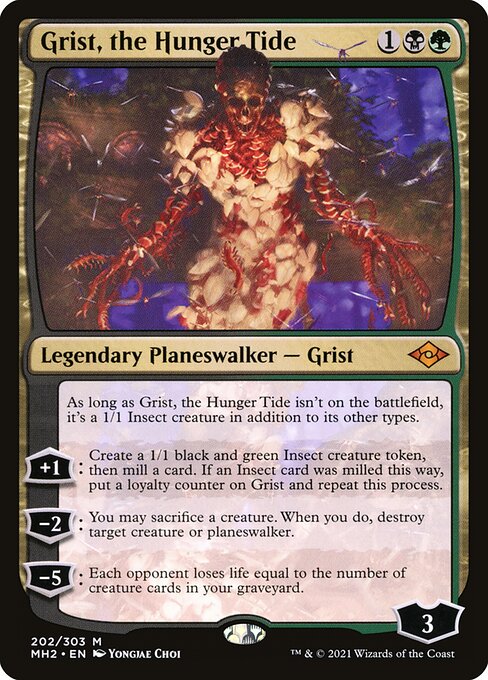
Your strategy in this matchup is to kill their mana dorks. If you do not control their mana sources, they will be too fast and combo kill before you. Or they will generate so many game objects that Archon doesn't do much, and just kill you post-Creativity. If you can successfully kill nearly every mana dork they play, then their low land count will constrain their ability to cast multiple spells and build up a meaningful board.
The two non-mana dorks you need to worry about are Grist and Yawgmoth. Grist can downtick to kill an Archon the turn after you Creativity, so you either need to answer Grist ahead of time or Creativity for more than X=1. Yawgmoth prevents you from casting Creativity on creatures, so you need to find a Leyline Binding or a Teferi to deal with him. Ideally, controlling the mana dorks means that they're forced to play a naked Yawgmoth or they don't get to four mana before you do.
Sideboard
+2 Fury
-2 Spell Pierce
Post-board, your plan is exactly the same, and the addition of Fury and Prismatic Ending allow you to do that even more effectively. You can also set up devastating Fury turns where you ping an Undying creature with Wrenn, Bolt another, then wipe away everything with Fury. Post-board, if you want an Archon, you'll want to try to Creativity for X=2, as that gives you a 90% chance to hit at least one Archon if you have three in your deck. If you've drawn an Archon, that drops to about 83%.
They'll have Necromentia and Thoughtseize, so Veil will be good, but it doesn't change the texture of the matchup.
I've toyed with bringing in Hallowed Moonlight against Yawgmoth, but I've found the two mana to be too expensive. It's low impact to stop Undying creatures/the Yawgmoth combo for one turn, so its best use is to counter a Chord of Calling or an Eldritch Evolution. While cantripping is nice, I've found that I much prefer the one mana of Spell Pierce over the two of Hallowed Moonlight.
Grinding Breach
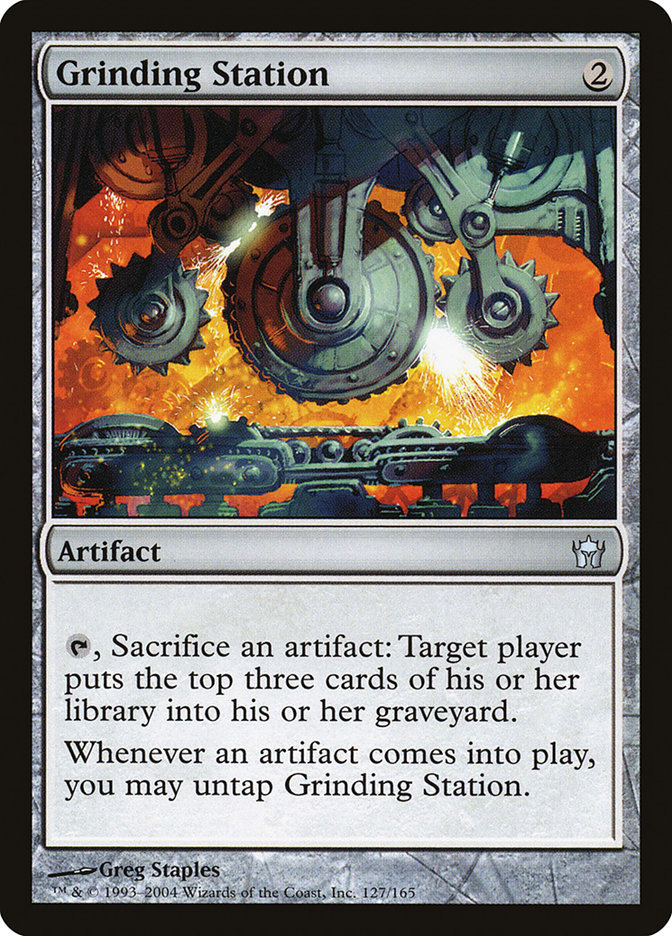
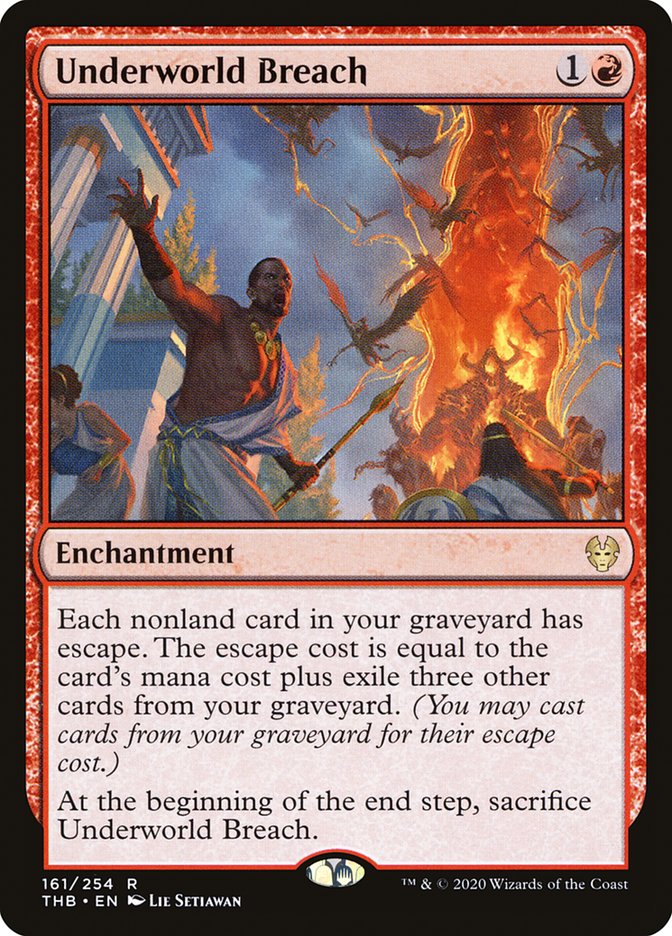
If the Breach deck draws the fairer half of their deck, you should be able to take Game 1. If they draw the combo half, you're probably dead. The cards you absolutely need to answer are Teferi, Time Raveler and either Grinding Station or Underworld Breach. You really want to use Leyline Binding to deal with Station/Breach, as Shattering the Station with Prismari Command simply taxes the Breach player two mana and three cards in their graveyard (though that is sometimes enough). While their spells are cheap, they do need to spend mana to set up their combo. If you can either force them to go for it while you have the answer or tap them low enough with Spell Pierce/Ice, then you should be able to resolve a Creativity with Spell Pierce backup on your turn. Because they are pressuring you and they have cheap interaction, you won't always have the luxury of waiting to cast Creativity for X=2. You may have to go for X=1, let the Archon get Unholy Heated, and then try to capitalize on your resource advantage.
Sideboard
+2 Turn the Earth
+2 Boseiju, Who Endures
+1 Wear // Tear
-3 Fire // Ice
Post-board, you are much better-able to interact with their gameplan. You should have the luxury of killing their Sagas while still having backup removal for creatures or Breach/Station. Turn the Earth is often enough to blank their Underworld Breach, particularly if you can flash it back. Because of this interaction, you're going to want to fetch Stomping Ground earlier than you otherwise would.
Cutting Fire // Ice leaves you a little bit colder to Ragavan, so you're still looking for an opening hand that can answer the monkey with Bolt, Wrenn, or Leyline Binding. Though Teferi is nice if it sticks, three mana is clunky into their increased number of Spell Pierces and/or Mystical Disputes post-board.
UW Control
Against UW Control, you employ the same plan as you do against Murktide. You're not in a rush, and every one of your threats is a must-answer. Better yet, UW Control's spells are more expensive than Murktide's, and their Leyline Bindings can be answered by your own Leyline Bindings. Be patient, and don't feel like you have to go for Creativity or overextend. If you have a permanent on the board (Wrenn, Fable, Teferi), then you are probably winning the game. Make them answer your threats, and when they tap too low, strike with Creativity. This is also absolutely a matchup where Archon of Cruelty is frequently hardcast in the lategame.
One other interaction to look out for – if Player A controls Teferi, Time Raveler and a Leyline Binding which has Player B's Leyline Binding underneath, then Player A's Teferi can bounce Player A's Leyline Binding to Player A's hand and draw a card. If these are the only nonland permanents, then when this happens, Player B's Leyline Binding returns, and the only legal target is Teferi Time Raveler. Player A can then recast Leyling Binding for W, exile Player B's Leyline Binding, and get back their Teferi, Time Raveler. They can repeat this loop by again bouncing their own Leyling Binding. This means that Player A can pay any amount of W mana to draw that many cards. As the Creativity player, you're likely to only be able to do it twice, but watch out if your control opponent is in this position instead.
Sideboard
Post-board, the UW player will likely pick up additional Dress Down, Dovin's Veto, and Hallowed Moonlight. Just like in the pre-board games, you are looking to leverage the fact that you have multiple must-answer threats and that their spells are more expensive. The post-board games play out about the same as the pre-board games.
Key Takeaways
5C Creativity is one of the strongest decks in Modern right now, with advantageous matchups throughout the top tiers. It is powerful, fun to play, and rewards dedicated practice. And you kind of have to try it out – how else will you know whether I'm trolling you by claiming that Search for Azcanta is playable in Modern?
Ryan Normandin is a grinder from Boston who has lost at the Pro Tour, in GP & SCG Top 8's, and to 7-year-olds at FNM. Despite being described as "not funny" by his best friend and "the worst Magic player ever" by Twitch chat, he cheerfully decided to blend his lack of talents together to write funny articles about Magic.


