


With the banning of Fury and Up the Beanstalk, Yawgmoth has arisen as one of the top decks in the format, if not the best. This can be seen by its dominance in challenges, mass sideboard inclusion of Cursed Totem, and overall increased meta percentage of the deck. With its new-found dominance, what better time is there for a complete guide to Modern Yawgmoth.
Breakdown of the Article and My Qualifications
Within this guide, I will go through a variety of topics related to understanding the power and playing Yawgmoth to adequately prepare any novice pilot and provide insight to more experienced ones. As for why I am qualified to write a guide on Yawgmoth, in my two years playing the deck (pre-lurrus ban) I have piloted the deck with a 61% win rate in major paper tournaments, a 71% win rate in Magic Online Leagues and have won two modern RCQs with the deck.
What is Yawgmoth?

Given that you are reading this article you probably know the basics. But, to start from the beginning, Yawgmoth is a Midrange-Combo deck in the modern format built around the card Yawgmoth, Thran Physician, and his synergy with undying creatures. It has a combo with Yawgmoth, two undying creatures, and Blood Artist that drains your opponent for life equal to the number of cards in your deck. Being a creature combo deck with tutors, it has the benefit of a very solid toolbox game plan with mainboard silver bullets.
What is the Main Combo Kill?
The combo kill in the deck relies upon rule 122.3, the Undying ability, and Yawgmoth's second ability. Rule 122.3 establishes that -1/-1 counters and +1/+1 counters cancel each other out whenever a player gains priority. The “undying” ability states that whenever a creature with undying dies it returns to the battlefield with a +1/+1 counter if it does not have one already. Yawgmoth’s first activated ability requires you to pay one life and sacrifice a creature to put a -1/-1 counter on up to one target creature and draw a card. While Yawgmoth's ability is most often used offensively to shrink opponent's creatures, when combined with two undying creatures you can loop the two undying creatures (through Rule 122.3) to effectively pay 1 life to draw a card.
")
To illustrate, imagine there are two Young Wolves on the battlefield and one Young Wolf has a +1/+1 counter on it. The Yawgmoth player (you) can sacrifice the Young Wolf without a counter to target the Young Wolf with a +1/+1 counter. This will cause the sacrificed Young Wolf’s undying ability to trigger and it will return to the battlefield with a +1/+1 counter. Then the Yawgmoth ability will resolve, drawing you a card and canceling out the +1/+1 counter on the other targeted Young Wolf. This returns the boardstate to its starting position only now you have lost one life and drawn one card. This can be repeated to draw as many cards as you are willing to pay life. In order to utilize this interaction to kill your opponent, all that is necessary is the inclusion of a Blood Artist within the loop. Blood Artist triggers on each creature death (i.e. the sacrifice from Yawgmoth) making your opponent lose one life and you gain one life each time Yawgmoth is activated. This counteracts the life paid to activate Yawgmoth and means that instead of losing one life for each card drawn, your life total will stay the same and instead your opponent's life total will decrease by one for each activation. This is the most basic example of a way the deck can win, but there are MANY more combos in the deck that will be explained in detail later.
What Makes the Deck Powerful?
There is no singular reason as to why this deck is powerful. Instead, it is a combination of factors that compound to make it a formidable deck in any metagame—but especially right now. The primary reasons the deck is powerful comes down to its basis as a midrange-combo deck, the high level of synergy between its pieces, the fact it plays heavily at instant speed, and the recent banning of cards that were efficient at disrupting it.
")
")
As a midrange-combo deck, Yawgmoth is able to consistently threaten a combo kill while developing its midrange game plan. In most games, you do not even kill with the combo. Instead you just attack your opponent and slowly beat them down while drawing cards. The dichotomy of both the combo and midrange gameplans being real threats puts your opponent in a difficult situation. If they focus too much on one aspect it allows for the development of the other. For example, if your opponent holds up removal for a Yawgmoth it is incredibly easy to develop more mana or play other threats such as Agatha's Soul Cauldron or Grist, the Hunger Tide. Even in the case of powerful and targeted hate, such as Necromentia or Unmoored Ego naming Yawgmoth, it often means that your opponent spends a whole turn not developing their board. In that situation the deck's gameplans to win with Grist, the Hunger Tide and Agatha’s Soul Cauldron are still very viable. This is not to say that a turn-three Necromentia is bad against Yawgmoth, it is just not the game-ending play that many people treat it as. If you are playing another deck against Yawgmoth, do not keep a hand with no pressure that has a Necromentia/Unmoored Ego, because then the Yawgmoth player will simply win with insects and Young Wolves.
")
")
Another key factor to the power of the deck is the synergy between its powerhouse cards. Yawgmoth combos incredibly well with Undying creatures and tokens from Grist. The tokens from Grist support Chord of Calling. Wall of Roots’ mana ability allows it to produce mana on each turn without tapping, which works incredibly well with Chord of Calling and Orcish Bowmasters. Agatha’s Soul Cauldron is also a powerhouse when combined with either Grist or Yawgmoth. Not only that, but Delighted Halfling is a 1/2 mana dork that makes Cauldron, Grist, and Yawgmoth uncounterable. It is very easy to keep going on about synergies, and each of these points will be touched on later, but the point has been made. The synergy between each piece of this deck is unlike anything else in the meta outside of maybe Hardened Scales. Hardened Scales, however, does not operate on multiple axes the same way Yawgmoth does.
")
Playing heavily at instant speed means the deck can be VERY reactive. Yawgmoth's abilities are instant speed and Orcish Bowmasters along with Chord of Calling allow you to play on the stack in a way that most creature-centric combo decks do not. This ability to play at instant speed makes the deck difficult to learn, as being able to make so many decisions allows the pilot to make more mistakes. With Yawgmoth in play, creatures in play, and mana available each time you gain priority, you are presented with a myriad of decisions. So while many lines are good, only a couple are optimal or “correct.” This high learning curve favors the seasoned Yawgmoth pilot though. As once you are experienced with the deck, you gain the advantage of being well-versed in this form of heavy stack interaction and can often think further ahead than your opponents. While unrelated to the instant speed of the deck, the fact that Yawgmoth draws so many cards also presents the player with more options, which means more opportunities to make mistakes.
")
")
Lastly, what has pushed Yawgmoth to the forefront of the meta right now is the banning of Fury and Up the Beanstalk. Up the Beanstalk meant that the four-color-control deck was able to very effectively stay at card parity against Yawgmoth with little to no mana investment. This made the matchup very poor, even with Orcish Bowmasters and Sheoldred. The Up the Beanstalk banning has sent four-color-control back to the Stone Ages and it is barely playable now. Fury, on the other hand, was a great piece of sideboard tech against us that could kill multiple early creatures such as Delighted Halfling, Orcish Bowmaster, and insect tokens or an Orc Army. Late game it was also a threat that could kill Grists and Yawgmoths. When Fury wasn’t sideboard tech it was in the mainboard of BR Scam in which it could be an early game 4/4 double strike or late game be a board wipe AND 4/4 with double strike. As a deck with very few kill spells, a “scammed” Fury was very difficult to deal with. These recent bannings completely eliminated a bad matchup (Beans/four-color-control) and significantly improved a medium matchup (Scam).
What are the Key Pieces?
For this section, I will be going line-by-line on the most important cards in the deck. We will look at the “Powerhouse” cards, as I refer to them, first and then the lower power cards from there. Of course, the first to be examined is the namesake:
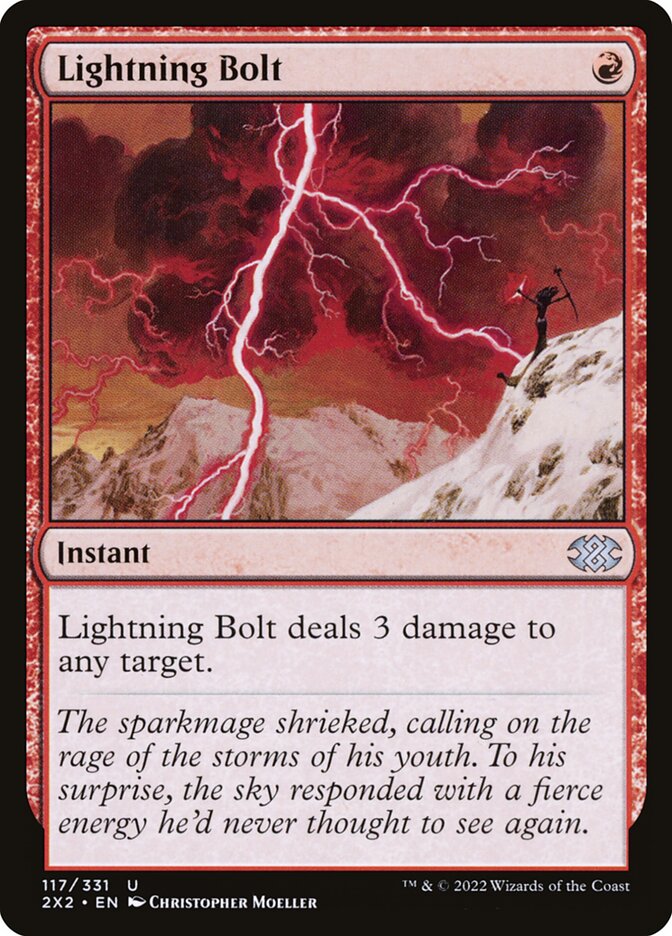
Yawgmoth, Thran Physician
Yawgmoth is a four-mana 2/4 legendary black human creature with three powerful abilities. Two are more relevant, and one is less useful but still comes up in important ways.
Protection from Humans
This ability is the least relevant but is still very good. This comes up in the mirror match where Yawgmoths cannot target each other. It is very relevant against Humans, where he is a perpetual blocker that also allows you to shrink their creatures and draw cards. Humans however is not a real deck currently, so this is unlikely to matter too often. Protection from Humans is very good against Prowess because now, with the inclusion of Questing Druid over Sprite Dragon, every single creature in the deck is a human; meaning Yawgmoth is both unblockable and a blocker that cannot be killed via combat damage. Protection from Humans also means that Asmoranomardicadaistinaculdacar (Asmo) cannot target Yawgmoth with her removal. The other relevant humans in Modern are Dragon’s Rage Channeler, which if delirium is turned off mid-combat can be freely blocked by a Yawgmoth, Architects of Will, and Shardless Agent from Living End and Living End/Rhinos. Further, in the Hammertime matchup, Yawgmoth can easily defend against an Esper Sentinel or Puresteel Paladin even if they have +10/+10 from a Colossus Hammer. So while this ability is not by any means his strongest, it is still relevant against many of the top decks—and saving a couple points of life here and there often translates to more cards in hand later on.
Pay 1 life, Sacrifice another creature: Put a -1/-1 counter on up to one target creature and draw a card.
")
")
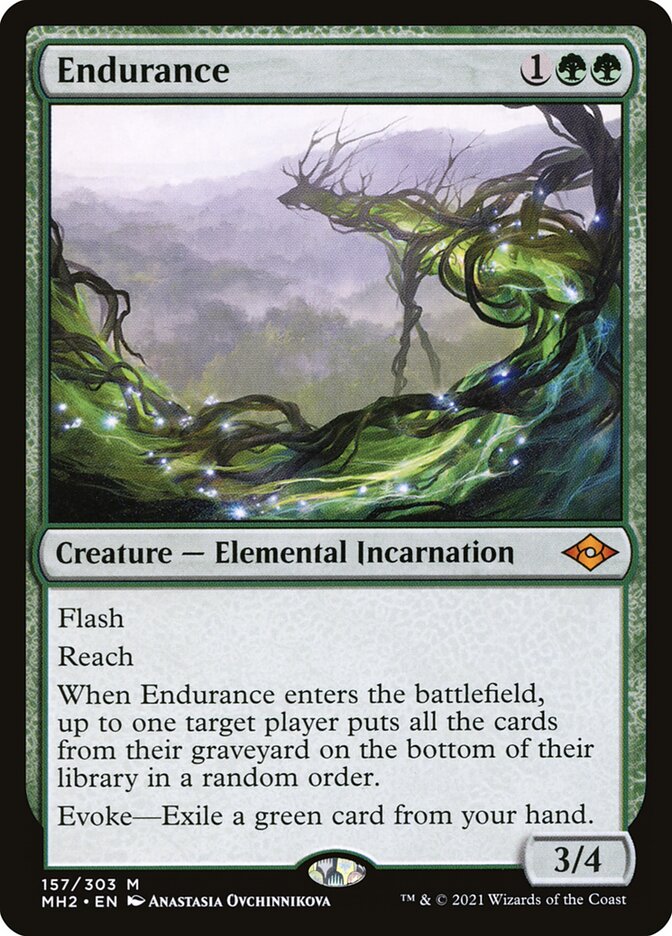
This ability has been mentioned the most for good reason. It heavily rewards token production, mana dorks, and works very well with undying creatures. Not only does a Yawgmoth and a Delighted Halfing allow you to kill opposing small creatures (or at least shrink them), but when combined with a Young Wolf or Strangleroot Geist you are able to draw an additional card for each non-undying creature. For example, imagine you control a Yawgmoth, a Delighted Halfling, and a Young Wolf and your opponent controls a Puresteel Paladin. You could easily sacrifice the Delighted Halfling and Young Wolf to Yawgmoth, each time targeting the Paladin, to put two -1/-1 counters on it, killing it, losing two life, and drawing two cards. However, to draw an additional card, you could first sacrifice the Young Wolf targeting the Paladin, then sacrifice the Halfling targeting the Wolf to remove its counter and then finally sacrifice the Wolf once more to kill the Paladin. This has the same end result but you have drawn an additional card and lost only one more life. As stated above, this is true for each additional creature. If there were two Delighted Halflings and a Young Wolf, you would have the ability to draw between zero and six cards. You may want to draw a variable number of cards given the conditions of the game. If you simply want to kill a 2/2 and preserve your life total, you may not target your Young Wolf at all and just lose two life, draw two cards, and kill the 2/2. If you want to dig deeper in your deck, you may sacrifice all three creatures drawing 6 cards and losing 6 life. This ability can serve as removal, can dig for specific cards, and, of course, allows you to combo kill. Endurance can also serve as a free creature to sacrifice to continue digging or kill a creature. The versatility provides major power to the deck. Being able to dig for specific cards means you can find combo pieces, Grist for removal, and silver bullets in game one.
Black Black, Discard a Card: Proliferate
Yawgmoth’s proliferate ability is far more relevant than most anticipate. The double black cost is prohibitive, but Agatha’s Soul Cauldron allows mana of any color to activate it, so that restriction is often irrelevant. The proliferate ability can shrink creatures en masse, grow your entire board, and proliferate your loyalty counters all at once. This ability was underrated before the printing of Agatha’s Soul Cauldron but Cauldron made the ability far better. Cauldron distributes +1/+1 counters onto your creatures which can make any creature a threat and with the proliferate ability they can all grow at instant speed. Cauldron’s synergy with Grist will be explained in depth later; however what is relevant now is that the proliferate can increase both +1/+1 and loyalty counters on your creatures. This allows you to not only ultimate Grist planeswalkers when your opponent may not expect it, but also ultimate creatures with planeswalker abilities from the Cauldron. Previously, the cost of discarding a card would not serve as an upside, but now putting creature cards in your graveyard aggressively is often beneficial.
When proliferating your creatures it is not uncommon you also proliferate your undying creatures. Because even though it makes it hard to combo with them, often having a 4/4 or 5/5 will be more important when killing your opponent with a beat-down plan. The proliferate ability is especially relevant against Rhinos, because once you have a counter on each of their creatures, two mana and discarding a card to shrink their board is a bargain, to say the least.
")
")
")
Additionally, your opponents will sometimes play cards with counters on them that you can mess with via proliferation! Chalice of the Void, for example, counters cards of mana costs equal to the number of counters on it. So if you have plenty of one drops but few two drops and are staring down a Chalice on one, proliferating the chalice can unlock a large portion of your hand. Aether Vial is an activated ability that checks the number of counters on resolution. Against Merfolk, a deck with plenty of two drops and fewer three drops, if you proliferate in response to an Aether Vial activation you can significantly mess up combat math for your opponent. Thus, if they planned on vialing in a two-mana Lord they may instead have, at best, no three-mana creatures or, at worst, a Sveylun or Tishana’s Tidebinder. As a final example, Blast Zone is a land that will sometimes see play in Tron as a reasonable destruction effect for when they have plenty of mana but little to do with it. With Yawgmoth’s proliferate ability, if they tick up the Blast Zone’s counters to deal with your permanents, you can proliferate it to a less preferential number before they get a chance to pop it.
Agatha’s Soul Cauldron
The other major powerhouse card of the deck is Agatha’s Soul Cauldron. The card is surprisingly like Yawgmoth as it has three abilities, two that are more obviously relevant and one that is often not thought of. Agatha’s Soul Cauldron is a two-mana legendary artifact that has significantly upped the power of the deck.
You may spend mana as though it were mana of any color to activate abilities of creatures you control.
As previously mentioned in the Proliferate section of Yawgmoth, this ability is far more relevant than most people anticipate. It allows proliferation at a much higher rate and in ways many do not expect. For example, having two Wall of Roots producing mana on both your turn and your opponent’s means that you can proliferate twice despite having mana dorks that appear to just produce one mana. Agatha’s Soul Cauldron gives you the abilities of other creatures, something to be explained shortly, and this ability becomes relevant again when you can give your creatures flying with Zabaz, the Glimmerwasp despite not having white mana. An important thing to mention about Proliferate is that you do not get to choose what counters are proliferated, only the permanents. This means if you have a Wall of Roots with a +1/+1 counter, -0/-1 counter, and a loyalty counter, if you proliferate you must add one more of each of them. You can not just increase the number of +1/+1 counters and loyalty counters.
The Cauldron’s second and third abilities are linked together so we will look at them together.
Creatures you control with +1/+1 counters on them have all activated abilities of all creature cards exiled with Agatha’s Soul Cauldron.
TAP: Exile target card from a graveyard. When a creature card is exiled this way, put a +1/+1 counter on target creature you control.
To go over the more obvious and simple interactions first, Cauldron is main deck graveyard hate which is powerful against decks like Scam, allowing us to snipe creatures being scammed with Undying Evil or Not Dead After All. It's also strong against UR Murktide taking out delirium, Living End to take out creatures in general, and many other decks that have minute graveyard synergies. It also serves as an onboard combat trick. Putting +1/+1 counters on creatures at instant speed makes combat in this deck even harder for our opponents. Despite being simple, both of these usages are very powerful and should not be underestimated. In fact, putting +1/+1 counters on Yawgmoth when facing Prowess allows you to break stalemates as you can swing with an unblockable 4+ power Yawgmoth.
")
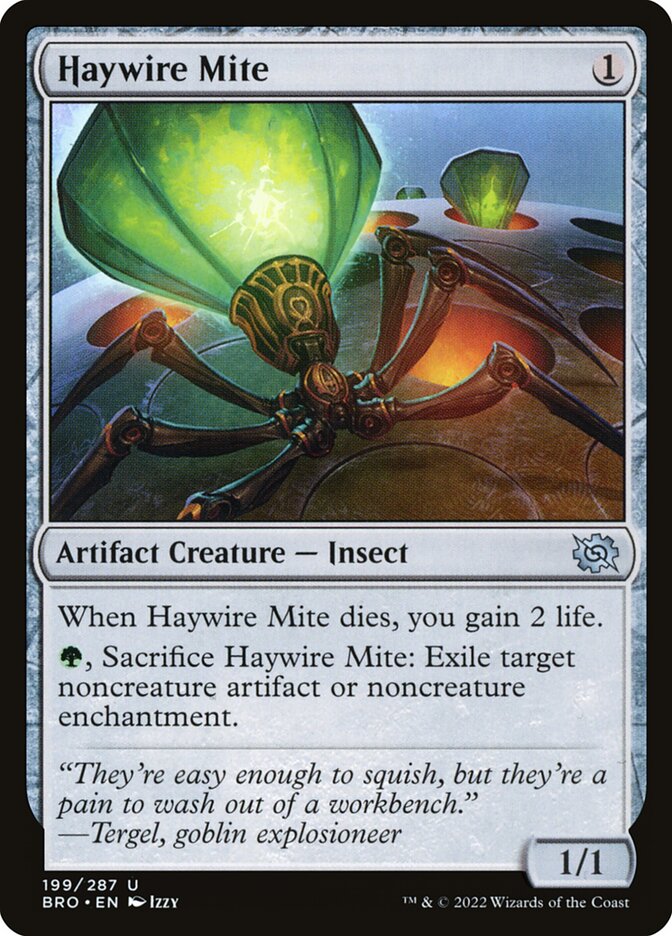
Onto the more difficult and powerful interactions, Cauldron can turn your creatures into Yawgmoths. This means that even if your opponent destroys your Yawgmoth they are not safe with it in the graveyard. Not only can it turn them into Yawgmoths but this deck is chock-full of activated abilities on creatures and “creatures”. Cauldron can give all your creatures the mana abilities of Delighted Halfling, Wall of Roots, or the Artifact and Enchantment removal ability of Haywire Mite. For combo potential, the Cauldron can give your creatures the abilities of Walking Ballista or Spike Feeder if they are in your deck, but that is to be discussed later.
The most complex interaction by far with Cauldron is that of it and Grist. Grist is a creature when not on the battlefield. This means that when it is exiled by Cauldron you get to put a +1/+1 counter on a creature and more importantly all your creatures with +1/+1 counters now gain Grist, the Hunger Tide’s loyalty abilities. They can do this because loyalty abilities are not inherent to planeswalkers, but simply abilities with a cost that is in terms of gaining or losing loyalty counters. However, losing loyalty counters due to damage is something specific to planeswalkers so while your creatures have loyalty abilities they will not lose loyalty from taking damage, they can not be attacked and they do not die for having zero loyalty. Cauldron allows your board to produce multiple tokens each turn, kill creatures if they have sufficient loyalty, and when combined with Yawgmoth’s proliferate ability, using your Young Wolf’s -5 loyalty ability to hit your opponent for 5+ life is not uncommon. In fact ultimating multiple of your creature to kill your opponent out of nowhere is a line that is not unlikely to come up in long tournaments.
Now that both Yawgmoth and Cauldron have been explained, a key interaction not obvious to many newer pilots is the Proliferate ability and Cauldron's exile ability. By activating Yawgmoth to Proliferate and discarding a creature you can hold priority to exile the creature discarded, put a counter on a creature, and then proliferate the counter just placed in addition to the counters already placed. When discarding Grist specifically this is important as a Grist in hand when played normally will only produce one token and can not kill itself the turn it enters, however if you want more tokens and have creatures with counters the proliferate ability allows you to get it into the graveyard immediately and start producing tokens at a much higher rate.
Grist, the Hunger Tide
Grist is a three-mana legendary planeswalker that has the very unique ability of being a 1/1 insect creature when anywhere other than the battlefield. This means it can be tutored with creature tutors such as Chord of Calling and Eldritch Evolution and can be countered by Stern Scolding. It can not be hit by Force of Negation and does not trigger Esper Sentinel.
Grist has three loyalty abilities, each reasonably powerful and relevant. First Grist has
+1: Create a 1/1 black and green Insect creature token, then mill a card. If an Insect card was milled this way, put a loyalty counter on Grist and repeat this process.
Repeatable token creation is very good for Yawgmoth and Chord of Calling. Having fodder to sacrifice to Yawgmoth means it is very easy to shrink your opponent's board and draw cards. With Chord of Calling each insect token is essentially a mana dork and it is not unusual for Grist to create three or more tokens making a Chord for four very achievable. The insects are good, but the milling is also great with Cauldron. Pre-cauldron printing the milling was pretty much irrelevant outside Grist’s ultimate ability, but now milling a Yawgmoth is beneficial when you have a Cauldron in hand or on board. The repetition of the ability is infrequent but very good when it does occur. There is more than just Grist in the deck for insect cards because Haywire Mite is often in the sideboard if not main deck and is an insect as well.
Grist’s second ability is in my opinion its best.
−2: You may sacrifice a creature. When you do, destroy target creature or planeswalker.
The ability itself is inherently not that good. If we just wanted a slot for removal we could include Fatal Pushes or any Terror variant. However, the combination of it being a tutorable planeswalker that can act offensively, token production & the ultimate ability, or defensively, removal, means that Grist is a mainstay of the deck. In the past, some lists ran only three but at this point four Grist is stock because the card is just so powerful. The cost of sacrificing a creature to the -2 ability is not as hindering as it is to other decks because Yawgmoth simply runs so many dinky creatures. Sacrificing an unnecessary mana dork or insect token is negligible and in the case of sacrificing a Young Wolf, it returns to the battlefield anyway. Grist being a way to remove large Murktide Regents, creatures Equipped with Colossus Hammer, and other high-toughness creatures like Dryad of the Ilysian Grove or Amulet Titan makes it vital to most matchups. And Grist kills these creatures without sacrificing your whole board and losing a lot of life.
Grist’s third ability is
−5: Each opponent loses life equal to the number of creature cards in your graveyard.
This is not as game-winning as other Planeswalker ultimates but is still capable of winning the game. Additionally, as previously mentioned with Yawgmoth’s proliferate ability, you can often ultimate your Grist out of nowhere for more damage than expected because not only does the proliferate get you closer to the -5 but also allows you to discard cards and make the ultimate deal even more damage.
Orcish Bowmasters
Orcish Bowmasters is a two-mana flash creature that creates an additional body and can serve as removal. At first glance, this card seems very good on its own and has little synergy with the rest of the deck, but this is untrue. It is both very good on its own AND has some serious synergy. Orcish Bowmasters has the ability:
When Orcish Bowmasters enters the battlefield and whenever an opponent draws a card except the first one they draw in each of their draw steps, Orcish Bowmasters deals 1 damage to any target. Then amass Orcs 1.
One damage pings kill early Dragon’s Rage Channelers, Ragavans, and Esper Sentinels. Bowmasters at its worst being two 1/1’s and 1 damage to your opponent is still very good as Yawgmoth always benefits from fodder to sacrifice. Plus, when combined with Chord of Calling, a two mana card that produces two creatures is effectively free as both can be tapped for convoke. When your opponents are drawing cards the Amassing of Orcs can make a very sizable threat. Without a Yawgmoth in play Orcish Bowmasters is very good and can control a board well, but when combined they are extremely powerful. Amass Orcs 1 puts one +1/+1 counter on your orc army and if you do not have one creates a 0/0 Orc Army and then puts a +1/+1 counter on it. This means that Bowmasters is a mass token producer if you are frequently sacrificing the orc army. For example, with the board of a Yawgmoth, an Orcish Bowmasters, a 1/1 Orc Army, two 4/4 Rhinos, and a Lorien Revealed on the stack, you could create a 4/4 Orc Army and deal three damage to your opponent or one of the Rhino tokens. However, in the same scenario, you could instead Kill one rhino and shrink the other to a 2/2 while drawing 3 cards and maintaining your board state. The way this would be done is by with the three Bowmaster triggers on the stack before the resolution of each trigger sacrifice the Orc Army token to target a Rhino with the -1/-1 counter. Then with the resolution of each ability, you sacrifice the newly created 1/1 before the next trigger resolves. By Marking three damage on one Rhino and then putting one -1/-1 on the Rhino with three damage and two -1/-1 counters on the other Rhino you do as previously suggested: killing a rhino and shrinking the other to a 2/2 while maintaining your board state of Yawgmoth, Bowmasters and a 1/1 Orc Army.
Orcish Bowmasters is a great card against UR Murktide specifically as Bowmasters has flash, the deck runs many one-toughness creatures and the deck will often draw cards off of Preordain and Ledger Shredder.
Chord of Calling
Chord of Calling has been a modern mainstay for a long time. Chord is an instant speed creature tutor that has convoke. Convoke allows you to tap creatures to pay for the mana cost in addition to your lands. This makes it very easy to cast Chord of Calling for X equal to four because you do not need seven lands instead you just need any combination of seven untapped creatures and/or lands. Tapping these creatures is part of convoke and not a cost the creature itself pays, this means that summoning sickness is irrelevant. As a result, all the one mana creatures, Orcish Bowmasters and Wall of Roots are each effectively free since they cost 1-2 mana and then pay 1-2 mana for the Chord. Additionally fetching for Dryad Arbor and then using Dryad Arbor to convoke gets around summoning sickness. Being an instant speed creature tutor that can cheat on mana is incredibly powerful. Being able to get effectively anything you need is great. Finding Grist for removal or tokens, Bowmasters in response to draw spells, a ramp spell to get Dryad Arbor, Wall of Roots or Delighted Halfling, find silver bullets and of course to get Yawgmoth.
Chord of Calling with Wall of Roots can be effectively a ritual as Wall of Roots produces mana on each turn and does not tap to do so. Given this condition, if Wall of Roots is cast and then activated to cast a one mana creature such as Young Wolf and Delighted Halfling on the opponent's turn it then can produce mana again and you can tap both the Wall of Roots and the one mana creature to pay three mana towards the Chord.
Now that we have gone through the most powerful cards in the deck we can look at…
What is the Deck's Composition?
Yawgmoth Lists are very stock for about 56 cards out of the 60 in the main deck and the sideboards are relatively stable as well.
The most consistent 35 non-land inclusions are:
4 Yawgmoth, Thran Physician
4 Grist, the Hunger Tide
4 Chord of Calling
4 Orcish Bowmasters
4 Young Wolf
4 Delighted Halfling
4 Wall of Roots
1 Blood Artist
1 Hapatra, Vizier of Poison
1 Dryad Arbor
1 Strangleroot Geist
3 Agatha’s Sould Cauldron (Though a somewhat sizable number of lists run two)
Then 21 (22 if you count Dryad) lands are very stock. Though there are plenty of 1-2 ofs in the mana base the goal is to limit damage from lands and as such there are typically only 5-6 fetch lands and 2 shock lands. A typical mana base may look like:
4 Verdant Catacombs
3 Blooming Marsh
2 Twilight Mire
2 Overgrown Tomb
2 Forest
2 Boseiju, Who Endures
1 Nurturing Peatland
1 Swamp
1 Pendelhaven
1 Takunema, Abandoned Mire
1 Misty Rainforest
1 Khalni Garden (Khalni Garden is not consistent and is often another Blooming Marsh, Nurturing Peatland, or Fetch land)
The other four cards are flex slots but typically at least one to two of them should be a cheap creature (0-2) mana and the other two to three can be three or more mana.
What are the Flex Slots?
 - Green Sorcery - Rare")
")
")
")
")
From there the variation comes from 0-2 Eldritch Evolution, 0-2 Endurance, 0-1 Walking Ballista, 0-1 Spike Feeder, 0-1 Haywire Mite, 0-1 Fulminator Mage, 0-1 Sheoldred, The Apocalypse, and 0-1 Ignoble Hierarch. Eldritch Evolution serves as an additional tutor, but for it to grab Yawgmoth you need to sacrifice a Strangleroot Geist or one of your other two drops. If there are two Eldritch Evolutions, a second Stangleroot Geist is almost guaranteed as sacrificing any other two drop is far more punishing to your gameplan. Endurances are by far one of the most popular silver bullets. It is very powerful against Living End and UR Murktide as the graveyard hate is incredibly relevant against each of them and in matchups where the graveyard hate is not relevant Endurance is still an aggressively costed flash creature which is on its own very good. In matchups where you need to aggressively combo Endurance is great as well as it can be a free creature to produce an extra “mana” for Chord of Calling. Walking Ballista and Spike Feeder are cards that see play purely for their combo potential with Agatha’s Soul Cauldron. Ballista and Feeder will only show up in lists that are more all-in on Cauldron, not lists that just run two. The two combo cards are also seeing less and less play due to their weakness without Cauldron. Haywire Mite and Fulminator Mage are two sideboard cards that synergize heavily with Agatha’s Soul Cauldron. However, both the Mite and Mage’s effects are generic enough that the main deck play is defendable. Modern decks play enough artifacts and enchantments that Mite is typically useful and the life gain from its death trigger is surprisingly important. Fulminator Mage being a land-destruction spell is mediocre, but when put under Cauldron blowing up all of your opponent's lands is very good. Sheoldred, the Apocalypse is a card that can solo the game as a midrange threat. It is typically played once your opponent has used their removal on other cards. A four-mana 4/5 with deathtouch that deals your opponent two when they draw a card and gains you two life whenever you draw. This means Sheoldred can be a threat without attacking and synergizes with Yawgmoth. The last of the most common cards in the flex slots is Ignoble Hierarch. Ignoble Hierarch is a good mana dork but having one toughness makes it very vulnerable to Orcish Bowmasters and Wrenn and Six.
What are the Other Combos?
The other infinite combos in the deck almost all revolve around Agatha’s Soul Cauldron. Not every combo is present in every Yawgmoth build as some require specific cards that are almost exclusively combo pieces. Some of these combos are also covered in video form by YouTuber and Patreon creator Control4Daze. He does a great job of explaining these here.
- Yawgmoth + Hapatra
")
The synergy between Yawgmoth and Hapatra allows you to wipe your opponent's board. Whenever you put a -1/-1 counter on a creature Hapatra creates a snake token. You can sacrifice this snake token to Yawgmoth and put a -1/-1 counter on your opponent’s creature and draw a card. Then Hapatra creates a snake and you can repeat this process as long as your opponent has creatures and you have life. Hapatra also works very well with Yawgmoth’s Proliferate ability as if you proliferate -1/-1 counters Hapatra will trigger for each creature proliferated. There are several sub-combos with these two cards.
A) Yawgmoth + Hapatra + Blood Artist
These three mean your opponent will lose all their creatures and lose life equal to the toughness of their creatures plus the number of creatures of theirs you killed. Your life total will not decrease but instead increase according to the number of creatures of your opponents that you killed. This often elicits a concession if they do not lose in the process.
B) Yawgmoth + Hapatra + Undying Creature
In this combo, instead of sacrificing an undying creature to target the other undying creature, Hapatra generates a token that removes the +1/+1 counter from the Undying Creature. This in effect is identical to the Yawgmoth + two Undying Creatures combo as it allows you to pay one life to draw a card.
C) Yawgmoth +Hapatra + Undying Creature +Blood Artist
This is effectively the lethal combo of Yawgmoth + Two Undying Creatures + Blood Artist. It is executed in the way described in Sub Combo 1B but you do not lose life and instead, your opponent does.
D) Yawgmoth + Hapatra + two Undying Creatures
This combo is the same as the Yawgmoth + two Undying Creatures combo except each time it is executed you lose one life, draw a card, and create a 1/1 snake token with deathtouch from Hapatra.
E) Hapatra works the same way with a creature with Yawgmoth abilities from Soul Cauldron
- Sheoldred + Yawgmoth + 2 Undying Creatures
")
This combo gains you “infinite” life and draws your entire deck. This is because the combo is executed as normal but Sheoldred gains you net one life with each Yawgmoth activation.
- Agatha’s Soul Cauldron w/ Yawgmoth Exiled + 2 Undying Creatures
")
In this combo, you do not need any other creatures as each loop will result in the other Undying with a +1/+1 counter and therefore having Yawgmoth’s abilities. The combo is then executed in the typical fashion with the creature with a +1/+1 counter sacrificing the other undying creature to target itself. The inclusion of a Blood Artist makes this lethal as expected.
- Agatha’s Soul Cauldron w/ Grist + Yawgmoth + Undying Creature
This combo allows you to pay one life to draw a card. However, to remove the counter the undying creature (which has a +1/+1 counter on it) creates an insect token using its Grist ability. The insect token is then sacrificed to target the Undying Creature, then the Undying Creature is sacrificed with no targets or targeting an opponent's creature. This can be repeated as you so choose. A Blood Artist makes this lethal. The only caveat is that this combo removes three cards from your deck per loop (two are drawn, one is milled) as opposed to the usual loop so there is a chance it is not lethal if your opponent's life total is greater than the number equal to 2/3rds of your library.
- Agatha’s Soul Cauldron w/ Walking Ballista Exiled + Yawgmoth + Undying Creature
This combo works as instead of using Yawgmoth to remove the +1/+1 counter the Undying Creature can instead remove the counter from itself with Ballista’s ability to ping any target. The Yawgmoth player will then sacrifice the Young Wolf repeatedly to draw cards, shrink the opponent's creatures, and deal damage. If you have more life than your opponent this combo is lethal as you can effectively pay one life to deal one damage to your opponent and draw a card. If they have more life this combo still is very good for board control. With a Blood Artist, this combo is always lethal.
- Agatha’s Soul Cauldron w/ Walking Ballista + Undying Creature + Blood Artist
")
This combo is lethal as a Young Wolf (or Strangleroot Geist) with a +1/+1 counter can remove a counter from itself to deal one damage to itself. Since it removed its counter as a part of the cost it then comes back to the battlefield with a counter and can repeatedly do this. Each time, the Undying Creature dying will trigger the Blood Artist. This deals infinite damage and gains infinite life.
- Agatha’s Soul Cauldron w/ Walking Ballista & Grist + Undying Creature
This combo produces “infinite” insect tokens. You can repeatedly kill your undying creature with Ballista’s ability and each time it enters as a “new” entity and you can activate its loyalty abilities again. Each time you will mill a card though so if you do it too many times you will lose due to having no cards in your library. Additionally, these insects can pay for a Chord of Calling which then makes this lethal by finding a Blood Artist!
- Agatha’s Soul Cauldron w/Walking Ballista & Wall of Roots + Undying Creature
This combo generates infinite green mana and deals infinite damage. With this setup, you first add a mana with the Wall of Roots ability on your Undying Creature and then you remove its +1/+1 counter to ping your opponent. It then returns to the battlefield with a +1/+1 counter and you can repeat ad nauseum.
- Agatha’s Soul Cauldron w/Walking Ballista & Delighted Halfling (or Ignoble) + Strangleroot Geist
This combo deals infinite damage as a Strangleroot Geist can repeatedly ping itself with the Ballista ability and each time tap for a mana. This generates infinite mana. You can then use the infinite mana to activate Walking Ballista’s four mana ability an infinite number of times, put infinite counters on the Geist, and then deal infinite damage to your opponent.
- Agatha’s Soul Cauldron w/ Spike Feeder + Yawgmoth + Undying Creature
This combo allows you to gain lots of life and draw your deck. Using Spike Feeder’s ability to remove a counter to gain two life, you can remove the counter from your undying creature and sacrifice it to Yawgmoth. You can repeat this loop as you like gaining one life and drawing a card each time. With the inclusion of a Blood Artist, it kills your opponent and gains two life per iteration. With the inclusion of a Walking Ballista, it is also lethal as you can alternate between removing a counter to ping your opponent and removing a counter to gain two life.
- Agatha’s Soul Cauldron w/ Spike Feeder & Wall of Roots + Undying Creature
This combo gives you infinite life and infinite green mana. This combo is almost identical to combo #7 however instead of pinging your opponent each loop you gain two life. However, gaining infinite life and getting infinite green mana should get a concession from your opponent or give enough advantage that you win.
That should cover a significant portion of the infinite combos. Cauldron creates a lot of accidental infinite and “infinite” combos. While this list is not exhaustive, because frankly I think that would probably be 5+ pages of just infinite combos, it should give you a good idea of what pieces are involved in combos you come across. Also, you will sometimes have actions that seem beneficial but in fact are not. For example, in grindy games where you are already ahead and deep into your library, there comes a point where it may not be beneficial to activate the +1 loyalty abilities of your creatures and planeswalkers because the milling of cards becomes far more relevant.
Major Matchups + Sideboarding
For some of the sideboarding and matchup explanations we will use the list I currently use on MTGO though the ideas transfer very well across different lists as the cards taken out are pretty consistent or the spirit of the sideboarding strategy is easy to maintain.
This list runs Haywire Mite, Fulminator Mage, Endurance, and Sheoldred as its main deck flex slots. Haywire Mite and Fulminator Mage are great against Amulet Titan and are even better with Agatha’s Soul Cauldron. Endurance is great to have vs Living End and UR Murktide. Sheoldred is a good midrange threat that synergizes with Yawgmoth and is great against Rhinos.
Blue / Red Murktide

")
IN: 2 Endurance, 1 Fatal Push, 1 Go for the Throat, 1 Reclamation Sage, 1 Tear Asunder
OUT: 1 Fulminator Mage, 1 Haywire Mite, 1 Blood Artist, 1 Geist, 1 Wolf, 1 Wall
You win this matchup by playing at instant speed to tax their mana. Endurance shutting Murktide Regents in hand is a very key play. Outside of that, turning off Delirium at instant speed to shut down Unholy Heats and DRCs is amazing. There will often be hate in the form of Unlicensed Hearse or Cursed Totem so Reclamation Sage and Tear Asunder are necessary for those. Fatal Push, Go for the Throat, and Tear Asunder are great instant-speed answers to creatures to alleviate pressure.
Rhinos
")
")
IN: 2 Thoughtsieze, 2 Chalice of the Void, 1 Soulless Jailer, 1 Fatal Push, 1 Legion’s End
OUT: 1 Haywire Mite, 2 Grist, 1 Cauldron, 2 Bowmasters, 1 Fulminator
The plan is to slow them down with Chalice, Jailer, and Thoughtseize then resolve a Yawgmoth to establish board control. Hapatra is key to drawing a ton of cards and clearing Rhinos but a Legion’s End can clear Rhinos as well if a Yawg has not yet been established. There is an argument for, when on the play, attempting to use Fulminator Mages to aggressively take the Rhinos player off of three-mana. In this case, I would cut an additional Grist and Bowmasters, then keep the one Fulminator in and bring in the other.
Titan
")
IN: 2 Thoughtseize, 2 Force of Vigor, 1 Fulminator Mage, 1 Go for the Throat, 1 Reclamation Sage, 1 Tear Asunder
OUT: 2 Grist, 2 Bowmasters, 1 Wall of Roots, 1 Geist, 1 Endurance, 1 Wolf
Bringing in a million pieces of interaction means that it is usually pretty easy to interrupt them. Having Mite, Fulminator and two Boseiju game one makes it a much better matchup. Getting a Fulminator under Cauldron at any point usually seals the game. Remember to fire off the Fulminator on bounce lands in response to the untap trigger and not on other lands. With cards like Boseiju, if they have multiple amulets it is better to hit the land with Boseiju than to take them from three Amulets to two. Hapatra is great for controlling the board, if you kill Dryad before triggers from Valukut resolve they don’t deal damage and if you can keep Amulets off the board you are much safer. Force of Vigor is VERY good.
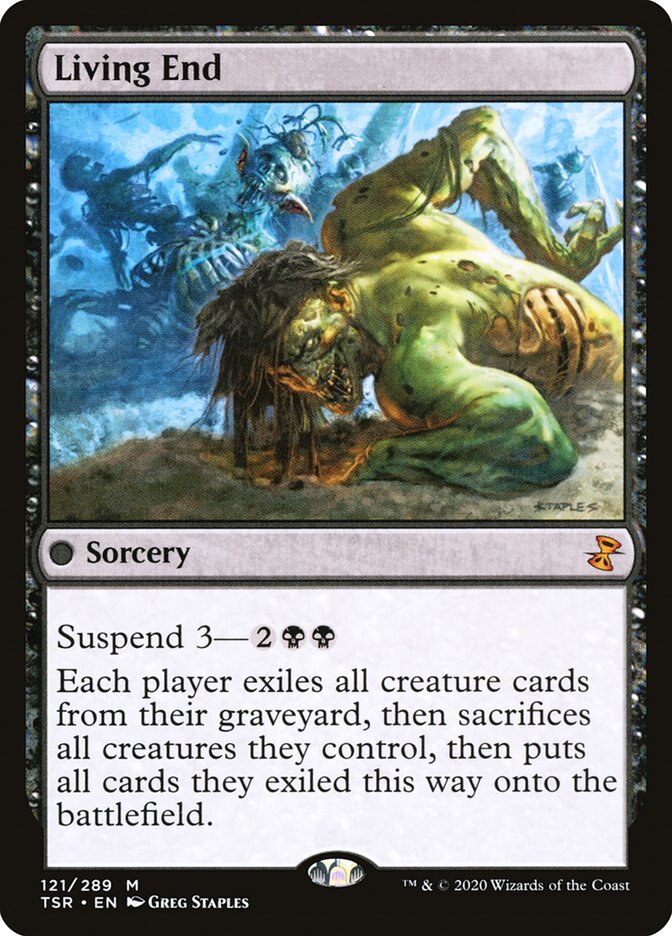
Living End
")
IN: 2 Chalice of the Void, 2 Endurance, 1 Soulless Jailer
OUT: 2 Bowmasters, 1 Wall of Roots, 1 Geist, 1 Fulminator
Endurance can blow out your opponent. However, Leyline of Sanctity often protects them which is what the Mite is for. Endurance main can help game one as well as the fact that Yawgmoth can sacrifice your whole board in response to a Living End. Outside of that Chalice and Jailer can slow down your opponent. This matchup is favored as we have plenty of potent hate and even have Fulminator and Endurance game one to slow them down. Yawgmoth as a card is just very good against Living End as it fills the graveyard and can even discard cards. Thoughtsieze could be brought in, but if they do not have a cascade card in hand you are likely just helping them rather than hurting them.
Tron
")
")
IN: 2 Thoughtseize, 1 Fulminator, 1 Tear Asunder
OUT: 2 Grist, 1 Wall of Roots, 1 Endurance
Maindeck Fulminator and Mite make game one much better for us. If we can get a Fulminator under Cauldron it is pretty much a game as they will never hit Tron and we can keep them on 2-3 mana. Thoughseize can take out the best haymakers against us and Mite + Tear Asunder can take out Ring or Map to disrupt getting Tron. With Fulminator it is important to keep in mind that four mana is very important as well because Karn TGC and Ring are both very good four mana spells. If on the draw I would consider a Force of Vigor to hit Maps, Sagas, etc, and take out a Cauldron.
Burn
IN: 1 Fatal Push, 1 Go for the Throat, 1 Legion’s End
OUT: 2 Agatha’s Soul Cauldron, 1 Fulminator Mage
Maindeck Sheoldred is very good, Cauldron is often very slow, and removal is key to prevent damage on the ground early. All you need is time so you can Chord for your Sheoldred or cast it from hand. Haywire Mite is a good way to deal with Roiling Vortex but even as a 1/1 that gains two life when it dies means it is worth an inclusion in the deck.
Hammertime
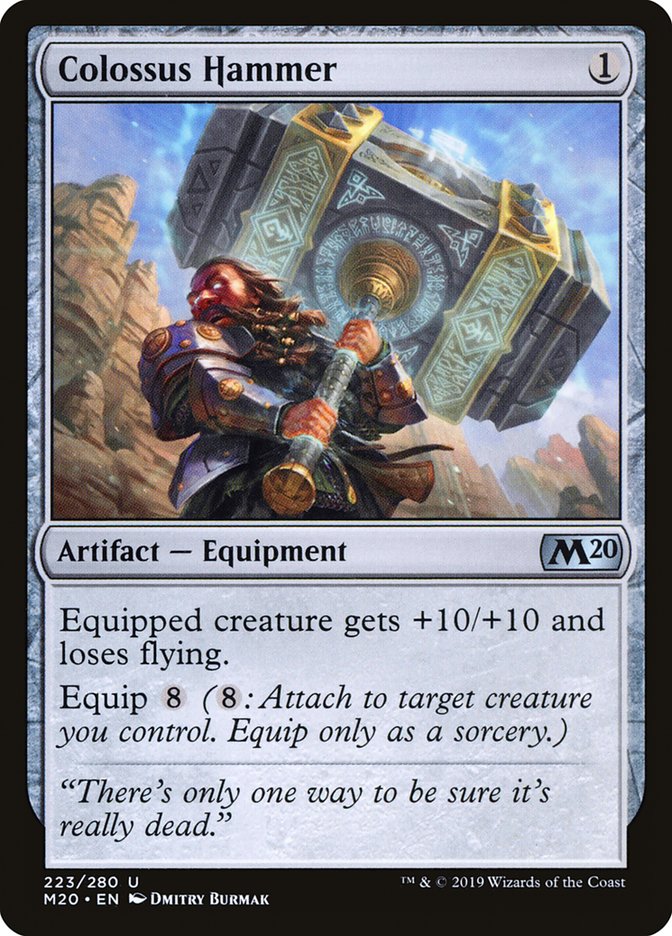
")
IN: 2 Force of Vigor, 1 Fatal Push, 1 Reclamation Sage, 1 Tear Asunder, 1 Legion's End
OUT: 1 Wall of Roots, 1 Endurance, 1 Fulminator Mage, 2 Grist, 1 Cauldron
This matchup is incredibly favored for us. Maindeck Haywire Mite is very good as it is incredibly efficient removal that works incredibly well with Cauldron. It can even Stone Rain Urza’s Saga on turn 2 before it even taps for mana. Force of Vigor is great and the other removal is pretty solid. Inevitably our deck of dorky creatures with Yawgmoth means we can chump-block endlessly and dig as much as we like.
Hardened Scales
")
")
IN: 2 Force of Vigor, 1 Fatal Push, 1 Reclamation Sage, 1 Tear Asunder, 1 Legion's End
OUT: 2 Wall, 1 Grist, 1 Endurance, 1 Geist, 1 Fulminator
This is a Cauldron matchup. If one person sticks a Cauldron unresolved they will run away with the game. With that said Yawgmoth is favored. Bowmasters are great for killing plenty of one-toughness creatures and provide fodder for Yawgmoth later on. The fact the -1/-1 counters cancel out +1/+1 counters works in your favor here too because it makes modular triggers worse. Fulminator and Mite are solid to have game one as they both hit Saga, Mite hits Cauldron and Fulminator hits Blinkmoth Nexus. Post board you gain plenty of interaction that makes the matchup even better. Just to reiterate: Force of Vigor is VERY good.
Red Black Scam
")
")
IN: +1 Go For the Throat, +1 Legion’s End, +1 Push, +1 Reclamation Sage
OUT: -Ignoble, -Blood Artist, -1 Fulminator, -1 Chord
Scam is a midrange game. Without Fury, you now have a much better gameplan. They now have Cursed Totem which isn't great but Reclamation Sage should solve that. Blood Artist and Ignoble are bad as they die to bowmasters and for Blood Artist the game cares more about high-quality cards than synergy.
Yawgmoth
IN: +1 Go for the Throat, +1 Fatal Push, +1 Legion’s End
OUT: -1 Wolf, -1 Fulminator, -1 Ignoble
Don't keep hands that are slow. You need real action and you need ramp. Landing a Yawgmoth first and controlling the board is the easiest way to win.


